Connecting your DJI drone to its controller may seem straightforward, but many users encounter frustrating connection issues that can hinder their flying experience. Whether you’re preparing for an exciting aerial shoot or simply hoping to enjoy a day of flying, understanding how to establish a solid connection is essential for maximizing the capabilities of your drone. This guide dives into the common problems you might face when connecting your DJI drone, providing practical solutions and tips to ensure a smooth setup every time. By the end, you’ll feel more confident navigating the nuances of drone technology, empowering you to focus on what really matters-capturing breathtaking footage and exploring new heights. Ready to get started? Let’s fix those connection issues and help you take to the skies with ease!
Understanding Drone Controllers and Connection Basics
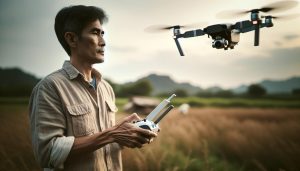
Understanding how to connect your DJI drone to its controller is fundamental for a successful flying experience. Whether you’re a novice or an experienced pilot, mastering the intricacies of drone controllers can elevate your flight capabilities and enhance your control over the drone. DJI’s technology combines sophisticated design with user-friendly interfaces, allowing for seamless connectivity between the drone and its controller. Proper understanding of connection basics is crucial for both safety and the optimal performance of your drone.
To connect your DJI drone, start by ensuring that both the drone and the controller are charged. Power on the controller first, followed by the drone. Most DJI drones use a pairing process that is initiated automatically; however, if pairing does not occur, you may need to manually connect the devices. This typically involves holding specific buttons on the controller and drone or using the DJI Fly app to initiate the connection. Make sure you are in a location free from interference, as other signals can disrupt the connection.
If you encounter connection issues, several factors may be at play, including firmware discrepancies between the drone and the controller or potential obstacles affecting the signal. Regularly updating your firmware not only ensures access to the latest features but also minimizes connectivity problems. Firmware updates can be easily executed through the DJI Fly app or directly via the DJI Assistant 2 desktop application. Following these updates, it’s important to recalibrate your drone to maintain its stability and responsiveness in flight.
Additionally, drone controllers offer various advanced features that can enhance your flying experience. Options such as customizable control settings, advanced flight modes, and geofencing can be accessed through the controller interface or the linked app. Understanding these features allows you to tailor your flying experience according to your skill level and flying environment. Always prioritize safety by familiarizing yourself with the controller’s functions, limits, and emergency protocols before taking to the skies. Thus, equipping yourself with knowledge about your controller and its connectivity enhances both your confidence and enjoyment while operating DJI drones.
Step-by-Step Guide to Connecting Your DJI Drone
To successfully connect your DJI drone to its controller, it’s vital to follow a systematic approach that guarantees a secure link for your flying experience. This connection is crucial as it directly impacts your control and the overall performance of your drone. Here’s a detailed guide to help you establish that connection effectively, whether you’re a beginner or have some experience.
Start by ensuring that both your controller and drone are fully charged, as a weak battery can lead to connection issues. Once charged, power on the remote controller first-this is a critical step as it allows the drone to recognize the controller during the pairing process. Next, turn on your drone, and observe the LED indicators that signal its readiness to connect.
Most DJI drones will attempt to pair automatically, but in case it doesn’t, you may need to manually initiate the pairing process. For most models, this involves pressing and holding the connection button on the drone while simultaneously pressing the linking button on the controller. Refer to your specific drone model’s user manual for the exact button locations. As an additional measure, ensure that you are in an area free from Wi-Fi interference and other electronic signals that can disrupt the connection.
After establishing the initial connection, it’s wise to launch the DJI Fly app on your smartphone or tablet. This app not only allows for further setup but also plays a vital role in updates and customizations. The app can help display the connection status and provide options to access advanced controls and features, enhancing your flying experience significantly.
Finally, it is essential to perform a final check before takeoff. Verify that the app recognizes both the drone and the controller, ensuring that all systems are functioning correctly. This initial setup not only boosts your confidence as a pilot but also enhances safety during your flight. Engaging in this careful, methodical approach transforms what may seem like a complex procedure into an exhilarating air adventure, setting the groundwork for successful flights ahead.
Troubleshooting Common Connection Issues
Connection issues are among the most common frustrations faced by drone pilots, but understanding how to troubleshoot these problems can significantly enhance your flying experience. One key factor to consider is that environmental interference can disrupt communication between the drone and the controller. If you encounter issues, first check your surroundings. Ensure you are flying in an area with minimal electronic noise-avoid crowded urban locations where Wi-Fi signals can interfere. A clear line of sight between the drone and the controller is essential for optimal connectivity.
If you find yourself unable to connect, start with a simple reset. Power off both the drone and the remote controller. Wait a few moments, then power them back on in the correct sequence-controller first, followed by the drone. This simple step can often re-establish a connection and reset any temporary issues that may have arisen. For models featuring an auto-pairing function, ensure that the drone is not already connected to another controller. If it is, you’ll need to switch to a different controller or reset the drone’s settings.
When connection attempts fail, it may also be beneficial to update the firmware on both the drone and the controller. Outdated software can often lead to compatibility issues that impede connectivity. Connect your devices to the DJI Fly app and check for any available updates, as these will typically resolve known bugs and improve performance. Additionally, performing a factory reset on the controller can clear persistent issues-just be mindful that this will erase your custom settings, so make sure to back them up if needed.
Lastly, remember to pay attention to the LED indicators on both devices. These lights provide vital information regarding the connection status. A solid green light usually indicates a stable connection, while flashing red lights may signal a problem. Consult your user manual for specific troubleshooting steps related to the blinking patterns for your particular drone model. By methodically addressing these potential connection issues, you can focus on capturing those stunning aerial shots without interruption.
Firmware Updates: Ensuring Optimal Performance
Keeping your DJI drone’s firmware up to date is critical for maintaining optimal performance and ensuring the best flying experience. Firmware updates can introduce improvements such as enhanced stability, added features, and crucial bug fixes that directly impact connectivity and functionality. Many pilots overlook firmware updates, which can lead to frustrating connection issues or subpar performance, especially when flying.
To start updating your firmware, connect your DJI drone to the DJI Fly app on your mobile device. Make sure both your drone and remote controller are fully charged before initiating the update process. Open the DJI Fly app and ensure you’re logged into your DJI account. The app will automatically check for any available updates upon connecting to your drone. If an update is available, follow the on-screen instructions to download and install it. This process typically takes just a few minutes, but it’s vital not to interrupt it. Interrupting an update can lead to more significant issues, potentially rendering your drone inoperable.
Why Updates Matter
Performing regular firmware updates does more than just fix existing bugs. These updates often include new features that can enhance flying capabilities, improve video transmission quality, and refine the user experience. For instance, recent updates for models like the DJI Mavic series have introduced better obstacle avoidance algorithms and improved camera settings. Additionally, staying up to date with firmware helps ensure compatibility with the latest features from the DJI Fly app, allowing you to take full advantage of all the functionalities provided.
Tips for a Smooth Update Process
To maximize the effectiveness of your firmware update experience, keep the following tips in mind:
- Check Network Stability: Ensure you have a strong internet connection when downloading updates.
- Review Release Notes: Before starting the update, check the release notes for what changes or improvements are included.
- Backup Settings: If you have customized settings on your drone, be sure to back them up as firmware updates may reset them to default values.
- Run Updates Regularly: Make it a habit to check for updates periodically, especially before important flights.
Understanding the importance of firmware updates not only enables you to fly more confidently but also encourages a proactive approach towards maintaining your drone’s performance. By prioritizing updates, you can alleviate many of the connectivity issues that commonly frustrate drone pilots and ensure your equipment is always ready for adventure.
Calibrating Your DJI Drone for a Stable Connection
Calibrating your DJI drone is an essential step in ensuring a stable connection between the drone and its remote controller. Calibration helps align the drone’s internal sensors and enhances its responsiveness, ensuring that it reacts accurately to control inputs. This process is particularly important before flying in unfamiliar areas or after making adjustments to the drone’s settings.
Start with a thorough pre-flight inspection. Check that both your drone and controller are fully charged and in good working order. Once everything is ready, power up your drone and remote controller. Open the DJI Fly app and connect to your drone. Navigate to the settings menu, where you’ll find the calibration option for the IMU (Inertial Measurement Unit) and compass. It’s crucial to follow the specific prompts provided by the app for calibration, as it will guide you through the necessary steps, which may include rotating the drone on different axes or moving it in specific patterns.
While calibrating the compass, find an open area away from metal objects and other electronic devices that could interfere with the calibration process. The app will guide you to rotate the drone to complete the compass calibration, which is vital for accurate navigation and maintaining a stable connection. Completing this calibration not only enhances the reliability of your drone’s navigation but also helps avoid issues like unexpected flyaways or altitude loss due to miscalibrated sensors.
After calibration, it’s wise to perform a test flight in a controlled environment to confirm that the connection is stable and that the controls are responsive. If you notice any discrepancies in how the drone responds to your inputs, consider recalibrating again. Regular calibration can significantly enhance the flying experience and is a necessary routine practice for both novice and experienced pilots alike, making it a cornerstone of effective drone operation.
Advanced Features: Enhancing Control and Connectivity
Unlocking the true potential of your DJI drone goes beyond basic flight control; it’s about leveraging advanced features that enhance both connectivity and performance. Many pilots, whether beginners or seasoned enthusiasts, often overlook the myriad of functionalities that can streamline their flying experience and maximize the capabilities of their drones. A solid understanding and application of these features can elevate your aerial photography, improve navigation, and ensure a seamless connection with your aircraft.
Intelligent Flight Modes
DJI drones come equipped with various intelligent flight modes designed to simplify complex maneuvers. Modes like ActiveTrack and Waypoints enable automatic subject tracking, while Point of Interest allows you to circle around a specified point. These features not only enhance your creative possibilities but also minimize the risk of connection issues by allowing you to focus on capturing the perfect shot without constant manual adjustments. To activate these modes, navigate through the menu in the DJI Fly app after establishing a stable connection with your drone.
Enhanced Connectivity Options
Connecting your drone to devices via Wi-Fi, USB, or other means provides flexibility in controlling your aircraft and accessing its features. For example, the DJI Fly app offers various connectivity configurations, including mobile device support for flight controls and live video transmission. Ensure your firmware is updated regularly as DJI releases patches that improve connectivity performance. By keeping the app and drone firmware synced, you reduce the likelihood of encountering common issues like the “RC not connected” error.
Additionally, utilizing the DJI’s OcuSync technology-available in models like the DJI Mavic Air 2-ensures a robust connection beyond visual line of sight. This not only expands your operational range but also enhances the transmission quality of the live video feed, providing real-time insights as you fly.
Customizable Controls and Quick Access Features
Another layer of control lies in the ability to customize buttons and shortcuts on your remote controller. Tailoring controls to suit your flying style can lead to improved responsiveness and an overall smoother experience. By adjusting settings in the app, you can assign functions to specific buttons, ensuring you access important features-like taking photos or starting the video recording-quickly without fumbling through menus.
Moreover, utilizing the Gimbal Settings to control camera stability and adjustments contributes significantly to video quality. Mastering gimbal movements through the remote allows for fluid video capture, particularly in dynamic environments.
Incorporating these advanced features into your flying routine not only enhances connectivity but also transforms your approach to aerial photography and videography. By exploring the full capabilities of your DJI drone, you position yourself to create stunning content while enjoying a more controlled and connected flying experience.
Comparing DJI Controllers: Which One is Right for You?
When it comes to operating your DJI drone, selecting the right controller can significantly impact your flying experience. Whether you’re a beginner or a seasoned pro, understanding the differences between various DJI controllers can help you make an informed choice that aligns with your flying needs and preferences. Two standout options in DJI’s lineup are the DJI RC and the DJI RC 2, each catering to different use cases and user requirements.
The DJI RC boasts a lightweight design and features an integrated FHD display with a remarkable battery life of up to four hours, making it ideal for casual flyers who value ease of use and portability. Its dual-spring control sticks enhance comfort during extended sessions, and it supports DJI’s O3+ video transmission technology, which allows for low-latency HD live feeds at a distance of up to 15 km when paired with compatible drones. This controller is suited for users who prefer a straightforward, user-friendly interface while still enjoying advanced transmission features. The built-in screen eliminates the need for a separate device, streamlining the user experience.
On the other hand, the DJI RC 2 steps up the game with enhanced technology that supports the latest DJI O4 video transmission system. Featuring a powerful processor and a bright 5.5-inch FHD display, the RC 2 is designed for those who demand a robust and responsive remote control experience. Its dual-band antenna setup improves signal strength and reduces interference, which is crucial for safer flights, especially in urban environments or areas with many wireless signals. If you’re looking for higher performance and extended capabilities-particularly for complex missions or professional-grade photography-the DJI RC 2 is an excellent choice.
When deciding between the two, consider your flying style and requirements. Casual flyers might lean towards the DJI RC for its simplicity and efficiency, while professionals would benefit more from the advanced features of the DJI RC 2, such as superior transmission performance and enhanced display quality. Both controllers are engineered to offer a seamless connection to your drone, reducing the likelihood of common issues encountered during flight.
Ultimately, the right controller can enhance not just your flying capabilities but also your overall enjoyment of the aerial experience, making it worthwhile to assess your needs before making a purchase decision.
Safety Precautions When Connecting Your Drone
Establishing a secure connection between your DJI drone and its controller is vital not only for optimal performance but also for ensuring the safety of your flying experience. Prior to initiating any connection, it’s crucial to check your surroundings and condition of the equipment to minimize risks and undesired incidents. A well-informed approach can enhance your flying sessions and foster confidence, whether you’re a novice or an experienced pilot.
To begin with, always ensure that both your drone and remote controller are fully charged. A depleted battery can lead to connection failures or, worse, a loss of control during flight. Additionally, examine the firmware on both devices; outdated software may not only hinder the connection process but also compromise safety features. Keeping your firmware up to date helps mitigate issues related to connectivity and enhances overall performance.
Environmental factors also play a key role in establishing a solid connection. Avoid areas with high electromagnetic interference, such as near power lines, large metal structures, or crowded places with many wireless signals. Ideally, perform a connection check in an open space with minimal obstructions. Furthermore, performing a range test before your flight can assist in verifying that the controller and drone can maintain stable communication over the expected distance.
Lastly, familiarize yourself with the remote controller’s safety features, such as Return to Home (RTH), and how they function when the connection is lost. This understanding not only adds a layer of safety to your operation but also ensures you’re prepared to handle any emergence with greater confidence. By following these precautions, you set the stage for safe and enjoyable drone interactions, reducing the likelihood of frustrating connection issues and safeguarding both your equipment and surroundings.
Understanding Different Flight Modes and Their Impacts
Understanding the various flight modes available in your DJI drone can dramatically enhance your flying experience, allowing you to optimize performance under different conditions and skill levels. Whether you’re capturing breathtaking aerial photography, practicing maneuvers, or racing through obstacles, selecting the right flight mode can make all the difference. Each mode not only influences how the drone responds to your commands but also how it interacts with the environment around it.
One of the most commonly used modes is GPS Mode. In this mode, the drone utilizes satellite signals to maintain a stable position and altitude, making it ideal for beginners and scenic photography. GPS Mode enables features such as Return to Home (RTH), which automatically brings your drone back to its launch point if the connection is lost or the battery is low. However, reliance on GPS can lead to issues in areas with poor satellite reception, such as dense urban environments or mountainous regions. Therefore, it’s essential to check the GPS signal strength before takeoff.
For those looking to push their flying skills further, Sport Mode offers increased responsiveness and speed at the cost of stability features like obstacle avoidance. This mode is perfect for experienced pilots who want to perform aerial acrobatics or race through challenging environments. However, it demands a high level of pilot control, as the drone may behave erratically, especially in the absence of GPS signals.
Additionally, Tripod Mode is an excellent option for capturing detailed footage or photos. This mode ensures a slow and steady flight, allowing for precision in movements, which can be particularly useful for filming static subjects or detailed landscapes. In contrast, CineSmooth Mode balances speed and responsiveness, providing smoother angles for cinematic shots while allowing pilots to make more controlled inputs.
Moreover, understanding ATTI Mode (Attitude Mode) is crucial for pilots operating in less-than-ideal conditions. In this mode, the drone relies on its onboard sensors rather than GPS, making it suitable for flying indoors or in areas where GPS signals are obstructed. However, pilots should be prepared for a loss of altitude hold and may need to manually adjust throttle to maintain height during flight.
By exploring these flight modes, pilots can adapt their flying style to fit their specific needs and environment. Practicing in each mode while being aware of the strengths and limitations ensures not only an enjoyable flying experience but also enhances safety and control over the drone, empowering users to make the most out of their technology. Furthermore, gaining familiarity with these modes can serve as an invaluable tool in troubleshooting connection issues, as understanding how different conditions affect flight performance aids in selecting the appropriate mode for any situation.
Integrating Mobile Apps for Enhanced Control
Integrating mobile applications into your drone operation not only enhances your control but can also drastically improve the quality of your flight experience. DJI offers several proprietary apps, such as the DJI Fly app, that serve as powerful companions to your drone by providing you with essential functionalities and real-time data. These apps facilitate a seamless connection between your drone and controller, ensuring you’re equipped with everything you need to operate efficiently and safely.
To begin, ensure that you have the latest version of the mobile app corresponding to your drone model. This is crucial, as updates often include improvements in connectivity and features tailored to enhance performance. Once the app is installed, connect your smartphone or tablet to the controller using the appropriate cable or wirelessly, depending on the model. The app will guide you through a setup process that often includes connecting to the drone’s Wi-Fi network, allowing for a stable communication link.
Key Features of Mobile Apps
Using mobile apps opens the door to various functionalities that can transform how you fly. Here are some primary features that can improve your flying experience:
- Live View and FPV Control: Enjoy a first-person view (FPV) streaming directly from the drone, allowing you to see what the camera sees in real time. This feature is essential for capturing the perfect shot or navigating complex environments.
- Flight Planning: Advanced apps allow for pre-flight planning, where you can set waypoints and flight paths. This is particularly useful for repetitive tasks like mapping and surveys.
- Telemetry Data: Monitor critical flight data such as altitude, speed, battery status, and GPS signal strength. This information aids in maintaining safe flight conditions and making informed decisions during your flight.
- Editing and Sharing: Some apps enable basic video editing capabilities and allow you to share your footage directly to social media platforms, streamlining the process of showcasing your work.
Moreover, syncing your DJI drone with a mobile app facilitates access to features like obstacle avoidance, automated flight modes, and intelligent shooting options. For instance, using the QuickShots feature in the DJI Fly app can simplify the process of executing complex aerial maneuvers with minimal input from the user. As you explore different functionalities, always remember to familiarize yourself with the user interface; this knowledge can significantly reduce the time spent troubleshooting or seeking assistance during a flight.
Finally, if you encounter any connection issues, refer back to the app for troubleshooting guides. These applications often include help sections that provide solutions to common problems, ensuring you can quickly get back into the air. By fully integrating mobile apps into your flying routine, you not only enhance your control capabilities but also improve your overall enjoyment and efficiency as a drone operator.
Best Practices for Maintaining Your Drone’s Connection
Maintaining a robust connection between your DJI drone and its controller is crucial for ensuring safe and effective operation. A stable link allows for optimal performance, enhanced control, and an overall better flying experience. To achieve this, there are several best practices that drone operators should adopt, which encompass both pre-flight preparations and in-flight strategies.
One fundamental practice is to always ensure that both the drone’s firmware and the DJI Fly app are updated to their latest versions. Firmware updates can fix bugs, improve connectivity, and enhance the overall functionality of your device. Before each flight, check the mobile app for notifications about required updates. Furthermore, establish a solid connection between the smartphone and the remote controller via a quality cable to minimize the risk of disconnections during operation.
- Conduct Regular Range Tests: Before heading into a full flight, take the time to perform a range test to confirm that you have a stable connection between the drone and the controller. By gradually increasing the distance, you can ensure that your device operates efficiently throughout its flight envelope.
- Choose an Optimal Flying Environment: Avoid flying in areas with significant electromagnetic interference such as near radio towers, power lines, or dense urban settings. Opt for locations with fewer obstacles that can obstruct the signal, improving the chances of maintaining a clear line of sight and strong connection.
- Manage Battery Levels: Both the drone and the controller should be adequately charged before a flight. Low battery levels can lead to a loss of signal. Always use original or high-quality third-party batteries and keep all devices fully charged.
- Regularly Clean Your Equipment: Dust, dirt, and debris can accumulate on the controller’s antennas and the drone’s sensors. Regularly inspect and clean these components to ensure optimal performance and signal clarity.
- Utilize Flight Modes Wisely: Familiarize yourself with different flight modes in the DJI Fly app, adjusting settings according to your flying conditions. For instance, using the “Beginner Mode” can help you avoid unnecessary signal loss during your early experiences.
Lastly, always prioritize safety when operating your drone. Be prepared for disconnection scenarios by regularly practicing emergency procedures, such as Return to Home (RTH). By adhering to these best practices, you’ll cultivate a seamless flying experience that maximizes control and minimizes the frustration of connectivity issues. Empowering yourself with knowledge and preparation not only enhances your skills as a drone operator but also ensures each flight is a successful endeavor.
FAQ
Q: How do I troubleshoot my DJI controller connection?
A: To troubleshoot your DJI controller connection, ensure both the drone and remote controller are powered on and charged. Verify that the DJI Fly app is updated and compatible with your device. Reset connections in the app, and try reconnecting using a different USB cable if necessary.
Q: What should I do if my DJI app says “RC not connected”?
A: If the DJI app displays “RC not connected,” check that your remote controller is paired correctly. Restart the app and the drone, and make sure the USB connection is secure. Refer to the DJI support website for specific troubleshooting steps based on your drone model [2].
Q: Why won’t my DJI drone connect to my smartphone?
A: Your DJI drone may not connect to your smartphone if the DJI Fly app is not installed or updated. Ensure Bluetooth is enabled on your smartphone, and check that your drone’s firmware is up to date. Follow connection steps in the app carefully to avoid setup errors [1].
Q: How can I connect my DJI drone without the app?
A: While the DJI app offers the easiest connection method, you can connect your DJI drone to the remote controller manually by turning on both devices and ensuring they are within range. Use the pairing method specific to your model, often found in the user manual.
Q: What are common issues when connecting a DJI drone to the controller?
A: Common issues include Bluetooth interference, outdated firmware, and incorrect app installation. Additionally, ensure both devices are fully charged and not too far apart during the connection process. Refer to the troubleshooting section in your manual for more detailed solutions.
Q: How do I perform a firmware update for my DJI drone?
A: To update your DJI drone’s firmware, connect your drone to the DJI Fly app, which will notify you of available updates. Follow the prompts within the app to download and install updates. Ensure a stable internet connection throughout the process to avoid disruptions.
Q: Is it necessary to connect my smartphone to the DJI drone?
A: Connecting your smartphone to the DJI drone provides access to enhanced features, live video feed, and comprehensive control options via the app. While it’s not strictly necessary for basic flying, utilizing the app significantly enhances your flying experience.
Q: What should I do if my drone disconnects during flight?
A: If your drone disconnects during flight, immediately switch to manual control if possible. Land the drone safely and check for signal interference or obstructions in the area. After landing, inspect your controller and drone for any connectivity issues and reset if needed.
Concluding Remarks
Now that you know how to effectively connect your DJI drone to its controller and troubleshoot any connection issues, don’t let a simple hiccup stall your flying adventures. For further insights, check out our guides on drone setup and firmware updates to ensure your equipment is always at its best. If you’re ready to take your skills to the next level, explore our in-depth reviews of the Mavic, Air, and Mini series drones to find the best fit for your flying needs.
As you utilize these tips, consider subscribing to our newsletter for the latest in drone technology, tips, and exclusive content! Empower your drone journey by diving deeper into our resources, and remember: mastering the skies starts with a solid connection. Join our community of passionate pilots and share your experiences-your next adventure awaits!