Mastering how to expose DLog-M on your DJI Mini 4 Pro can elevate your aerial videography to new heights, unlocking the camera’s full potential. Proper exposure is crucial for capturing high-quality footage, especially with DLog-M’s extended dynamic range, which allows you to fine-tune the details in both highlights and shadows. Whether you’re a budding enthusiast or a seasoned professional, achieving the perfect exposure not only enhances the visual impact of your content but also simplifies the color grading process in post-production. In this guide, we’ll walk you through essential video settings and practical tips to ensure your shots are consistently well-exposed, making your cinematic creations stand out. Get ready to dive deeper into the world of aerial filmmaking and transform your results!
How DLog-M Enhances Video Quality on DJI Mini 4 Pro

When it comes to capturing stunning aerial footage, the color profile you choose can dramatically impact your video’s overall quality. The D-Log M color profile, available on the DJI Mini 4 Pro, is specifically designed for serious videographers seeking flexibility in post-production while enhancing visual fidelity. This logarithmic profile compresses the dynamic range of your footage, allowing for a broader spectrum of color grading options after shooting, which is particularly beneficial in varied lighting conditions.
Dynamic Range and Color Grading
D-Log M excels in environments with high contrast where shadows and highlights are pronounced. By preserving this dynamic range, D-Log M allows for detailed recovery of highlights and shadows during the color grading process. This results in richer, more vibrant visuals that can elevate the emotional resonance of your footage. When properly exposed, D-Log M can provide a starting point for your edits that retains the nuances of light and color, ensuring that they transition smoothly in post-processing.
Moreover, D-Log M’s flat color profile minimizes color clipping, enabling a seamless transition to popular color outputs like Rec.709. For professionals, this means that the footage can be more easily matched with other materials shot under different conditions, which is a crucial factor in creating cohesive projects. Many users find that the enhanced color depth and flexibility allow them to create visually compelling stories that stand out in a crowded visual landscape.
To fully leverage the advantages of D-Log M on the DJI Mini 4 Pro, understanding how to expose your shots correctly is essential. Aim for slightly underexposing your footage to avoid highlight clipping while preserving more detail in the shadows. With D-Log M, achieving your desired visual narrative becomes not just easier, but also a more creative process, as the data captured allows for more exploration in post-production and storytelling.
Essential Pro Video Settings for DLog-M

Capturing high-quality video footage using the D-Log M profile on the DJI Mini 4 Pro requires a thoughtful approach to settings. The effectiveness of this flat color profile hinges on several key video configurations that significantly impact the final output. By understanding these essential settings, videographers can unlock the full potential of D-Log M and ensure their aerial shots are not just well-exposed but also rich in detail and color.
First and foremost, always ensure your ISO is set appropriately. The general rule for shooting in D-Log M is to keep the ISO as low as possible to maintain image quality. Ideally, try to expose at an ISO of 100 or 200 whenever lighting conditions allow. This setting helps reduce noise in your footage, which is especially crucial during color grading. If you find yourself in brighter conditions, be mindful of shutter speed. To achieve a natural motion blur, utilize the 180-degree shutter rule, which suggests setting your shutter speed at double your frame rate. For example, if shooting at 30fps, set your shutter speed to 1/60th of a second.
Moreover, white balance can dramatically affect the color profile performance in D-Log M. Unlike standard profiles, D-Log M can exaggerate color shifts if not properly calibrated. Always set a specific white balance instead of using auto settings, adjusting it according to the environment-typically around 5500K for daylight and 3200K for indoor scenes. This helps maintain color accuracy and consistency across your footage, simplifying the editing process later.
Don’t overlook the importance of ND filters. These filters are vital for controlling exposure without needing to adjust your aperture or shutter speed dramatically. Using the right ND filter allows you to keep your shutter speed within the desired range while maintaining a shallow depth of field and avoiding overexposed highlights. Select ND filters based on your shooting conditions; for instance, an ND16 is suitable for sunny days, while an ND4 might be enough for cloudier conditions.
By carefully selecting and managing these settings, videographers can enhance their ability to create striking visuals with the D-Log M profile on the DJI Mini 4 Pro. This meticulous approach ensures not only stunning footage but also a smoother and more efficient post-production process.
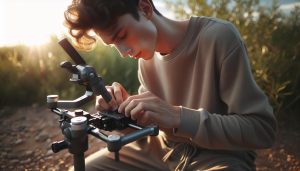
Step-by-Step Guide to Enable DLog-M
Enabling D-Log M on your DJI Mini 4 Pro is a crucial step toward capturing cinematic quality footage that highlights the nuances of light and color in your aerial shots. With its flat color profile, D-Log M allows for more dynamic range and flexibility in post-processing, giving videographers the ability to achieve stunning color gradations and textures. Here’s how to get started.
To enable D-Log M, first, power on your drone and connect it to the DJI Fly app on your mobile device. Navigate to the camera settings by tapping the settings icon on the main screen. Look for the “Video” tab and click on it to reveal various options. Here, you’ll find the “Color” settings where you can select D-Log M. Choose this option, and watch as your camera adjusts to the flat color profile designed for maximum color information retention. Once you’ve selected D-Log M, make sure to adjust your resolution and frame rate to your desired settings, typically choosing 4K resolution at 30 fps for high-quality recordings.
It’s also vital to check that your camera is set to the correct ISO and shutter speed to optimize the use of D-Log M. After setting the color profile, ensure your ISO is as low as possible, ideally at 100 or 200, to limit noise in your footage. Adjust the shutter speed according to the 180-degree rule to capture smooth motion blur. This step is essential, particularly in action scenes or fast-moving shots, where maintaining a natural feel is crucial. Lastly, stabilize and calibrate your gimbal before flying to ensure the footage remains steady, making the most out of your D-Log M clips.
With D-Log M enabled and properly configured, you are now ready for takeoff. Remember, shooting in this color profile will require some thought in post-processing, but the rewards in terms of flexibility and visual quality make it worthwhile. Take a moment to familiarize yourself with the D-Log M footage before heading out, ensuring you’re well-prepared to capture breathtaking visuals that can be molded in the editing room.
Understanding the Color Profile of DLog-M
Capturing high-quality video footage requires an understanding of various color profiles, and DLog-M stands out as an excellent option for those using the DJI Mini 4 Pro. This specific color profile is engineered to maximize the dynamic range, offering a flat look that retains detailed information in both shadows and highlights. The beauty of shooting in DLog-M lies in its flexibility during post-processing, allowing filmmakers to craft the aesthetic they envision by pulling focus on specific colors and contrast levels.
One of the defining features of DLog-M is its logarithmic curve, which compresses the tonal range of your footage. This means that while the image may appear desaturated and low in contrast straight out of the camera, it is designed to capture as much color data as possible. The reduced contrast helps prevent clipping in highlight and shadow areas, making it an ideal choice for scenes with varying light conditions. When grading DLog-M footage in post, the possibilities are almost limitless; you can enhance saturation, achieve deeper blacks, or create soft pastel tones, depending on the project’s needs.
When shooting with DLog-M, understanding how to expose your footage correctly is crucial. Overexposing can lead to losing highlight details, while underexposing can introduce noise in darker areas. To achieve optimal results, aim for a balanced exposure that avoids hitting the extremes of the luminance range. Utilizing tools like zebra stripes in the DJI Fly app can assist in identifying overexposed areas, allowing you to adjust camera settings accordingly.
Ultimately, employing DLog-M not only elevates the quality of your video but also enhances your editing workflow. Mastery of this color profile can lead to stunning visual storytelling, making it worth the extra effort in both shooting and post-production processes. As you gain experience, the techniques for fine-tuning DLog-M footage will become a valuable addition to your creative toolkit.
Tips for Post-Processing DLog-M Footage
Post-processing DLog-M footage can transform your raw drone recordings into stunning visual narratives, but it requires a nuanced approach to unlock the full potential of the captured image data. One of the first steps involves correcting the exposure and color balance. Since DLog-M footage appears flat and desaturated straight out of the DJI Mini 4 Pro, begin by adjusting the contrast to bring back depth to your footage. Look for highlight and shadow details, and utilize tools like curves and levels to meticulously balance your tonal range.
A key aspect of working with DLog-M is applying a LUT (Lookup Table) to quickly achieve a pleasing contrast and color grading. While DJI provides LUTs for DLog-M to Rec.709 conversion, experimenting with third-party options might yield even better results according to user feedback. A well-selected LUT can serve as a great foundation, allowing you to further refine colors, saturation, and sharpness to suit your artistic vision.
When grading, take your time to explore hue vs. saturation curves or luminosity masks, which can help isolate certain colors for enhancement without affecting the overall balance. For instance, you might want to increase the saturation of greens if you’re working with landscape footage or enhance skin tones in aerial shots of people. Remember to monitor your scope displays-waveform and vectorscope-to ensure you’re not losing detail in your highlights or shadows.
After establishing a strong base with your LUT and initial grades, consider using selective adjustments to enhance specific areas, applying masks to focus on particular elements while leaving the rest more subdued. Finally, remember to render tests at different resolutions to ensure your editing choices hold up in various viewing contexts, as the quality can drastically change across different screens. By following these tips, you’ll be well-equipped to elevate your DLog-M footage into professional-grade content that captivates your audience.
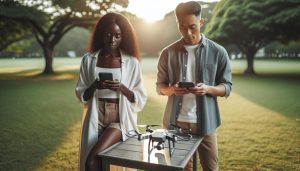
Best Accessories for DLog-M Video Shooting
To achieve outstanding results when shooting with DLog-M on your DJI Mini 4 Pro, having the right accessories can make a significant difference. High-quality gear not only enhances your shooting experience but also helps you capture the full potential of this versatile color profile. Whether you’re a seasoned cinematographer or a hobbyist, here are some essential accessories that can elevate your DLog-M video production.
ND Filters
To maintain optimal shutter speed and achieve that cinematic look, using Neutral Density (ND) filters is crucial, especially in bright conditions. ND filters reduce the amount of light entering the camera, allowing you to shoot at a slower shutter speed, which is vital for achieving natural motion blur. This accessory helps you create a more filmic quality while retaining the detail and dynamic range that DLog-M offers.
Gimbal Stabilizer
While the DJI Mini 4 Pro comes equipped with a built-in gimbal, adding an external stabilizer can take your footage to the next level. A dedicated gimbal stabilizer helps in capturing smooth, professional-grade shots, crucial when working with the flat color profile of DLog-M. It minimizes unwanted camera movements, allowing for fluid transitions and steady tracking shots, which are essential for creating engaging visual narratives.
External Monitor
Seeing your footage accurately is vital when working with flat profiles like DLog-M. An external monitor allows you to view your live feed with increased clarity and accuracy, enabling you to better judge exposure, color balance, and focus. Additionally, many external monitors come with built-in tools such as waveforms and histograms, which help ensure that you are capturing the best possible footage straight out of the camera.
Battery and Storage Solutions
Extended shooting sessions demand reliable power and storage. Investing in additional batteries ensures that you won’t be limited by flight time, especially during important shoots. Coupling that with high-speed SD cards can facilitate faster data transfer rates, essential for capturing the high-quality footage DLog-M provides without dropouts or glitches. High-capacity cards also allow for longer recording sessions, giving you more freedom to explore creative angles and composition.
By integrating these accessories into your workflow, you can maximize the capabilities of the DJI Mini 4 Pro’s DLog-M profile, resulting in professional, polished videos that stand out in both content quality and visual appeal.
Common Challenges and Troubleshooting DLog-M
When shooting in DLog-M mode on the DJI Mini 4 Pro, achieving the perfect exposure can sometimes feel daunting. This flat color profile is designed to capture a wider dynamic range, but it also means that you must be more vigilant about overexposure or underexposure due to its inherent characteristics. One common challenge is dealing with highlights that tend to get clipped in bright conditions. To counter this, use the built-in histogram feature to monitor your exposure: aim to keep the graph from spilling over to the right side, which indicates clipping.
Another issue often faced is the muddy colors that may emerge if the footage is not properly exposed during shooting. Flat profiles like DLog-M require precise adjustments to ensure that the image retains its quality post-processing. When you shoot in DLog-M, it’s essential to overexpose slightly-to avoid losing detail in shadows-while still keeping highlight areas in check. A practical tip is to use +0.3 to +0.7 exposure compensation, but this can vary based on lighting conditions.
Furthermore, maintaining proper white balance can also be challenging. The flat nature of DLog-M means it can appear less vibrant than standard profiles if not adjusted correctly. To mitigate this, manually set your white balance instead of relying on auto settings. A preset based on your shooting conditions-like sunny, cloudy, or tungsten-can help maintain color accuracy and improve the overall look of your footage.
In terms of troubleshooting, if your footage appears too grainy or noisy, particularly in low-light scenarios, this can indicate shooting at a high ISO. When using DLog-M, aim for an ISO that maintains the lowest noise possible, preferably below 800 when shooting in low light. Additionally, ensuring that your drone firmware is up to date can resolve many issues related to performance and image quality, so regularly check for updates from DJI.
By understanding and addressing these common challenges, you can enhance your DLog-M shooting experience on the DJI Mini 4 Pro, leading to stunning, high-quality videos that leverage the full potential of this powerful color profile.
Comparing DLog-M with Other Color Profiles
When it comes to shooting stunning aerial footage with the DJI Mini 4 Pro, understanding how DLog-M compares to other color profiles is crucial. This knowledge allows you to choose the right profile for your specific needs, whether you’re capturing breathtaking landscapes or vibrant cityscapes. While DLog-M is designed for professional use, offering greater dynamic range and flexibility in post-production, other profiles like Normal and HLG (Hybrid Log-Gamma) each have their unique advantages that may cater to different shooting scenarios.
DLog-M is characterized by its flat color profile which captures a wider range of highlights and shadows. This makes it ideal for scenes with significant contrast, such as sunsets or high-dynamic range environments where detail in both bright and dark areas is paramount. However, the trade-off is that footage might initially look washed out or dull straight from the camera. This makes it essential for operators to engage in post-processing to bring out the colors and contrast, making it a choice best suited for those comfortable with video editing.
In contrast, the Normal color profile is straightforward and ideal for quick shoots without the need for extensive post-processing. It produces vibrant colors directly out of the camera, perfect for everyday videos or when time constraints don’t allow for detailed editing. Normal mode is user-friendly and provides sharp footage that often requires little to no adjustment, making it an excellent choice for beginners or those aiming for a more straightforward workflow.
Finally, HLG serves as a middle ground between DLog-M and Normal. It offers a better dynamic range than the Normal profile while remaining easier to work with than DLog-M. HLG is especially advantageous for those working with HDR displays, enabling use in real-time broadcasting or cinematic settings. It retains more contrast and highlights than the Normal profile, but not to the extent of DLog-M, which means it can still provide colorful, engaging footage without the heavy editing workload.
In summary, the choice between DLog-M, Normal, and HLG will depend on the desired outcome of your footage and your proficiency in color grading. While DLog-M is optimal for high-end cinematic projects, Normal and HLG cater to quicker, more efficient workflows. Selecting the right profile can significantly impact the final quality of your videos, ensuring that they meet your creative vision.
User Experiences: Real World DLog-M Results
Capturing video in DLog-M on the DJI Mini 4 Pro can yield stunning results, but operators often have varied experiences based on their shooting conditions and editing skills. One common theme among users is the need for careful exposure management; many find that underexposing slightly can help maintain highlight details when grading in post. This can be particularly beneficial in high-contrast scenes such as bright sunsets or urban landscapes with intricate shadow details. To ensure a balanced exposure, piloting experts recommend using the histogram feature available in the camera settings, which provides real-time feedback on exposure levels.
User feedback highlights that, while the initial footage may appear flat and lifeless straight out of the drone, post-processing offers the chance to breathe life into the images. Operators who invest time in learning color grading techniques report impressive transformations, turning seemingly dull clips into vibrant and dynamic visuals. For instance, many content creators emphasize the power of using LUTs (Look-Up Tables) specifically designed for DLog-M footage. These LUTs can assist in quickly adjusting color and contrast, making the editing workflow much smoother. Moreover, several users advocate for experimenting with different LUTs to find the one that complements their unique shooting style and aesthetic.
Another important aspect is the lens choice and flying conditions. Users have shared that shooting during the golden hour, when natural light is soft and warm, enhances the DLog-M footage quality, making colors richer and reducing the amount of color correction needed later. Additionally, employing ND filters is frequently mentioned as a game-changer; they help maintain optimal shutter speed while allowing for deeper color saturation and better overall image fidelity.
It’s worth noting that new pilots transitioning to DLog-M often face a learning curve regarding editing. Engaging with online communities, watching tutorials, and practicing regularly can drastically improve editing skills. Real-world experiences shared by users indicate that those who take the time to understand color grading not only produce more professional-looking videos but also find greater satisfaction and creativity in their drone filming projects.
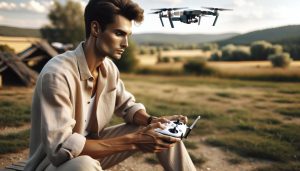
Advanced Techniques for Mastering DLog-M
Mastering DLog-M on the DJI Mini 4 Pro can significantly elevate your videography game, allowing you to produce cinematic-quality footage that stands out. One of the primary techniques to enhance your results is familiarizing yourself with the nuances of color grading. By leveraging tools such as LUTs (Look-Up Tables) specifically tailored for DLog-M, you can transform flat-looking footage into vibrant and dynamic visuals. Experimenting with various LUTs can provide a tailored look that resonates with your artistic style, giving your projects unique flair.
Another essential technique is to pay attention to your shooting conditions. The time of day when you fly your drone can have a profound impact on the quality of the captured footage. Golden hour–the period after sunrise or before sunset–offers soft, diffused lighting that enhances color saturation and reduces harsh contrasts. Also, employing ND filters will help you maintain the appropriate shutter speed, which allows for smoother motion without compromising image quality. This is particularly critical when shooting in bright conditions, where proper exposure can be challenging to achieve.
For those looking to delve deeper, consider using advanced post-processing techniques. Tools like DaVinci Resolve or Adobe Premiere Pro come equipped with advanced color grading features that allow you to manipulate shadows, midtones, and highlights independently. This granularity in control enables you to recover details that initial footage may obscure, especially in high-contrast scenes. Don’t overlook the potential of curves and selective color adjustments, which can further refine your video and highlight specific elements in your compositions.
Lastly, embracing a workflow that includes practice and community engagement can vastly improve your skills with DLog-M. Join online forums or social media groups where fellow drone enthusiasts share their experiences, tips, and struggles. Engaging with others who are on the same journey can not only motivate you but also provide you with insights that can enhance your shooting and editing skills. As you refine your understanding of these advanced techniques, you’ll likely find that both your competence and confidence in using DLog-M grow, resulting in visually stunning, professional-grade footage that sets your work apart in any setting.
Legal Considerations for Filming with DLog-M
Filming with your DJI Mini 4 Pro, particularly when utilizing DLog-M for enhanced video quality, brings exciting creative opportunities but also necessitates a thorough understanding of legal considerations. Drones have become a powerful tool for filmmakers, yet their use is governed by a complex web of regulations that vary by location. The first step to ensuring compliance is to familiarize yourself with the local laws regarding drone flight and aerial photography.
In many countries, regulations require drone operators to maintain a certain distance from people, vehicles, and structures. For instance, the FAA in the United States mandates that drones remain within the pilot’s line of sight and above 400 feet in controlled airspace. Additionally, certain areas, like airports, government buildings, and private properties, are off-limits for drone flights without explicit permission. It’s essential to check regulations from the relevant authority in your area, such as the Civil Aviation Authority (CAA) in the UK or the Federal Aviation Administration (FAA) in the USA.
Permits and Privacy Laws
Beyond flight regulations, you may also need permits for commercial projects or when filming in specific locations, especially if you’re working in public lands or private properties. Always seek permission from property owners before capturing images or footage that feature their land. Privacy laws also come into play, as capturing individuals in public without their consent can lead to legal challenges. It’s advisable to familiarize yourself with local privacy laws, which can dictate how and when you can film individuals or property.
A comprehensive understanding of insurance options is equally crucial. Many professional filmmakers opt for drone insurance to cover potential damages that could arise from accidents or injuries. This not only protects your investment in your equipment but also demonstrates a level of professionalism and preparedness that can reassure clients.
To enhance your compliance, consider joining a local drone community or online forums, as they can often provide valuable insights into navigating legalities specific to your area. Engaging with the community can help you stay updated on any changes in drone regulations and improve your overall filming practice. Always prioritize safety and legality so that you can focus on capturing stunning aerial footage with your DJI Mini 4 Pro, knowing you’re operating within the law.
Upcoming Firmware Updates Impacting DLog-M
The advancement of firmware updates for your DJI Mini 4 Pro can significantly enhance the DLog-M video quality and overall functionality of your drone. Keeping your firmware up to date is essential, as manufacturers frequently release updates that introduce new features, optimize existing performance, and improve camera settings. For those utilizing DLog-M, updates may include refined profiles, expanded compatibility, and adjustments that enhance color accuracy and dynamic range, which are crucial for professional video production.
One potential upcoming update could introduce advanced options for histogram displays, enabling pilots to better assess exposure while shooting in DLog-M. A comprehensive histogram provides valuable insight into whether the highlights or shadows are clipping, thus ensuring that your footage captures a wider dynamic range without losing detail. Additionally, updates may enable new shooting modes or increase ISO performance, which can further streamline the capturing of high-quality video in challenging lighting conditions.
It’s also worth monitoring enhancements related to the DJI Fly app. For instance, future releases may offer improved post-processing tools that allow you to edit DLog-M footage directly within the app, streamlining your workflow from shoot to final cut. This is particularly beneficial for creators who value efficiency and aim to produce quick turnarounds on their projects.
Lastly, consider joining online drone communities or forums where enthusiasts discuss and share insights on upcoming firmware updates. They often provide hands-on experiences and practical advice regarding the latest features, which can help you maximize the performance of your DJI Mini 4 Pro and take full advantage of DLog-M’s capabilities. Keeping an eye on these resources will equip you with the knowledge necessary to harness the full potential of your drone as it evolves.
Q&A
Q: What is DLog-M on the DJI Mini 4 Pro?
A: DLog-M is a flat color profile that enhances dynamic range and color grading flexibility in videos shot with the DJI Mini 4 Pro. It provides a more detailed color representation, making it ideal for professional video projects where post-production editing is required.
Q: How do I find the right exposure settings for DLog-M?
A: To achieve the right exposure for DLog-M, use the histogram and highlight warnings on your DJI Mini 4 Pro. Aim for a balanced histogram without clipping in highlights or shadows, typically adjusting ISO, shutter speed, and aperture while monitoring exposure levels.
Q: Can DLog-M be used in low-light conditions?
A: Yes, DLog-M can be utilized in low-light scenarios. However, it’s crucial to pay attention to noise levels. Use a lower ISO setting and additional lighting where possible to maintain video quality.
Q: What are the best settings for filming in DLog-M?
A: The best settings for filming in DLog-M include a shutter speed of 1/50 for 24fps, aperture adjusted for depth of field, and an ISO setting adjusted based on light conditions. Maintain a white balance tailored to the shooting environment for accurate color representation.
Q: Why is color grading important for DLog-M footage?
A: Color grading is essential for DLog-M footage because the flat color profile requires adjustments to bring out contrast and saturation. Proper grading enhances the visual impact, creating a polished and professional look in the final video.
Q: What tools can help with post-processing DLog-M video?
A: Editing software such as Adobe Premiere Pro or DaVinci Resolve is highly recommended for post-processing DLog-M video. These tools offer powerful color grading features and allow for detailed adjustments to achieve the desired look.
Q: Are there specific filters that work best with DLog-M?
A: ND (Neutral Density) filters are beneficial when shooting DLog-M as they help manage exposure without sacrificing shutter speed. This allows for better control over motion blur and depth of field, enhancing overall video quality.
Q: How does DLog-M compare to other color profiles like_norma?
A: DLog-M offers more dynamic range and flexibility for post-production compared to standard color profiles like Normal. While Normal may provide more immediate visual results, DLog-M is preferred for projects requiring extensive editing and color correction.
Closing Remarks
Now that you have the essential techniques for exposing DLog-M on your DJI Mini 4 Pro, you’re well-equipped to elevate your video production quality. Remember, mastering exposure and color grading can significantly enhance your cinematic visuals, so don’t hesitate to practice and refine your skills. For more tips on optimizing your shooting techniques, check out our articles on advanced drone settings, or explore our guide on post-production color grading to further enhance your footage.
Don’t let your creativity stop here! Subscribe to our newsletter for the latest insights and updates in the drone world. If you have any questions or want to share your experiences using DLog-M, we encourage you to leave a comment below. Engaging with fellow drone enthusiasts can spark new ideas and techniques. Whether you’re just starting or looking to advance your skills, there’s always more to learn-and we’re here to help you every step of the way!