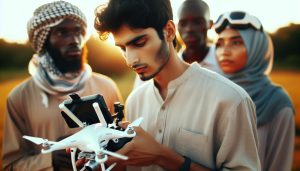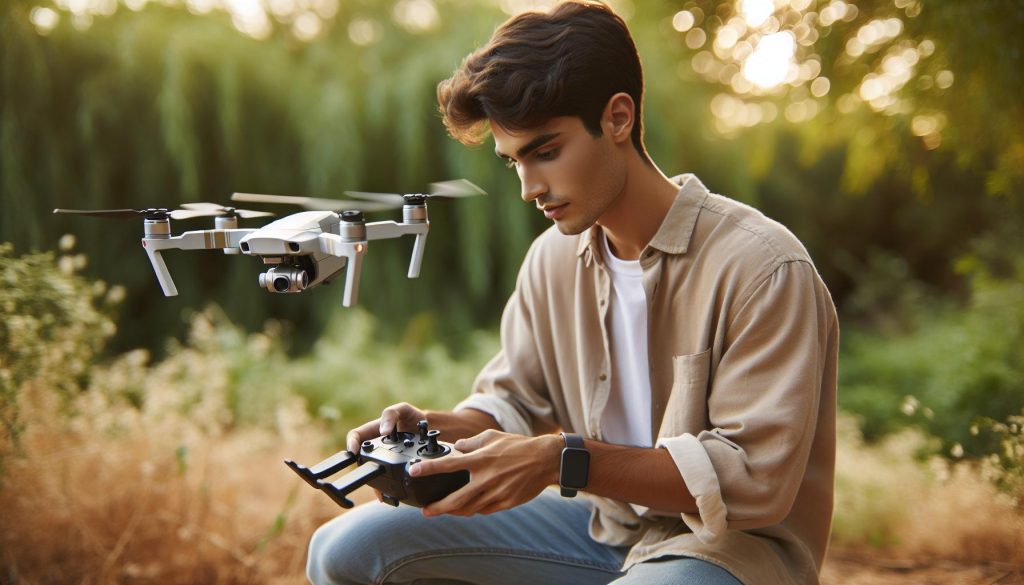
MasterShot modes in DJI drones can elevate your aerial photography and videography to new heights, offering creative and dynamic ways to capture stunning footage with ease. Understanding how to change and optimize these settings is essential for both budding enthusiasts and seasoned pilots. Whether you’re aiming to impress with cinematic shots or simply want to document your adventures, mastering these functions will streamline your shooting process and enhance your overall experience. This guide will walk you through the various modes, their functionalities, and tips on how to adapt settings for different scenarios. By the end, you’ll gain the confidence to unleash the full potential of your DJI drone and create breathtaking visuals that capture the imagination. Ready to transform your aerial storytelling skills? Let’s dive in!
MasterShot Overview for DJI Drones
Captivating aerial footage has become increasingly accessible, thanks to advancements in technology and user-friendly features integrated into DJI drones, particularly the MasterShot functionality. This innovative feature utilizes intelligent algorithms to simplify complex shots, making it easier for both novice and experienced pilots to create stunning cinematic sequences. By understanding how to effectively utilize MasterShot modes in DJI drones, operators can dramatically enhance their video production capabilities, ensuring that every flight becomes an opportunity to capture breathtaking images.
MasterShot modes offer various options tailored for different filming scenarios, including Dronie, Circle, Helix, and Rocket, each designed to automate specific movements for dynamic visuals. For instance, the Dronie mode allows the drone to ascend while facing the subject, capturing a revealing shot that adds scale and context to the scene. In contrast, the Circle mode orbits an object, providing a captivating perspective that can showcase subjects from every angle. Understanding these modes not only expands your creative toolkit but also empowers you to focus more on composition and storytelling rather than technical maneuvers.
To get started, ensure your drone’s firmware is updated to the latest version to access all available MasterShot functionalities. When you’re ready to fly, select the MasterShot mode that best fits your narrative. Adjust settings such as obstacle avoidance sensitivity to enhance safety during complex maneuvers, particularly if you’re filming in crowded or challenging environments. Additionally, consider wind conditions and lighting to optimize your shots and achieve the best results.
As you embark on your journey with DJI’s MasterShot feature, remember to review and analyze your footage afterwards. Understanding what worked, and what didn’t will enhance your skill set and prepare you for even more ambitious projects in the future. By mastering these techniques, you not only improve your drone handling abilities but also elevate the storytelling power of your video content, making every flight a chance to capture moments that resonate.
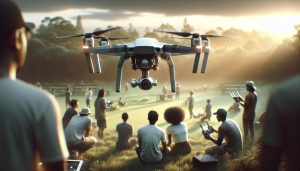
Exploring Different MasterShot Modes
In the dynamic world of aerial cinematography, the right shooting mode can make all the difference in capturing stunning visuals. MasterShots are a game changer for DJI drone operators, combining intelligent algorithms with user-friendly controls to automate complex flight paths. Whether you’re a beginner eager to learn or an experienced pilot looking to streamline your workflow, understanding the various MasterShot modes available can significantly enhance your storytelling capabilities.
Each MasterShot mode is crafted for specific scenarios, ensuring that users can effortlessly obtain professional-quality shots. Here’s a closer look at some of the key modes:
Dronie
In Dronie mode, the drone takes off vertically while keeping the subject in frame, gradually revealing the surroundings. This mode is perfect for showcasing landscapes or providing context to the subject by highlighting the scale of the environment.
Circle
The Circle mode executes a smooth orbit around the selected subject. This mode is ideal for capturing dynamic visuals of moving subjects, providing a 360-degree perspective that adds depth and intrigue to your footage.
Helix
Helix combines upward movement with a circular path, creating a dramatic spiraling effect. This is particularly effective for emphasizing a subject against a vast backdrop, making your aerial footage pop.
Rocket
Rocket mode allows the drone to ascend straight up, framing the subject below while pulling away. This shot is striking for revealing action scenes and offers a breathtaking view as the camera pulls back to showcase more of the environment.
Boomerang
In Boomerang mode, the drone traces a back-and-forth path around the subject. This mode combines the orbiting effect with a zoom-in and zoom-out, delivering an enthralling shot that draws attention to both the subject and its surroundings.
Overview of MasterShot Modes
| Mode | Description | Best For |
|---|---|---|
| Dronie | Ascending flight maintaining focus on the subject. | Landscapes and context shots. |
| Circle | Orbits around the subject. | Dynamic, multi-angle shots. |
| Helix | Spirals upward around the subject. | Highlighting depth and scale. |
| Rocket | Vertical ascent while keeping the subject centered. | Revealing broader scenes. |
| Boomerang | Forward and backward path around the subject. | Creative orbiting shots. |
Armed with this knowledge, you can strategically choose the appropriate MasterShot mode that aligns with your narrative. Each mode allows you to focus more on composition rather than the logistics of flight, giving you the freedom to unleash your creative potential. As you explore these different options, remember to consider the subject, environment, and desired emotional impact to make the most out of every flight. With practice, these modes can transform your videography, turning each aerial capture into a compelling story that resonates with your audience.
Step-by-Step Guide to Adjusting Settings
Adjusting settings on your DJI drone can significantly enhance the quality of your captured MasterShots. Whether you’re aiming for cinematic excellence or simply want to ensure smooth operation, optimizing various settings is paramount. Begin by accessing the DJI Fly app (or whichever app your drone uses) once your drone is connected. Navigate to the settings menu, where you’ll find numerous options tailored to improve your footage quality and flight safety.
Start with the Camera Settings. Here you can adjust the resolution and frame rate, depending on your desired output. For most cinematic shots, a resolution of 4K at 30 fps is ideal. This allows for high-quality video while maintaining manageable file sizes. If you’re going for a slow-motion effect, consider increasing the frame rate to 60 fps or even 120 fps, if supported by your model. Adjusting the ISO settings based on lighting conditions is also essential; lower ISO values produce clearer images in bright environments, while higher ISO settings may be necessary for low-light conditions, although they can introduce graininess.
Next, explore the Flight Settings. These settings help tailor your drone’s performance. Adjust the sensitivity of the control sticks to suit your flying style-beginner pilots may prefer softer responses, while advanced users might opt for a more responsive setting. Additionally, enabling Obstacle Avoidance can help prevent mishaps during complex maneuvers, particularly when utilizing MasterShot modes that involve intricate flight paths. Pay attention to the Return-to-Home (RTH) settings to ensure your drone will safely return to its takeoff point in case of low battery or signal loss.
Lastly, consider reviewing and adjusting the Gimbal Settings. Fine-tuning the gimbal’s pitch speed and smoothness can mitigate the effects of sudden movements, resulting in more stable footage. For shots that require a dramatic effect, such as a quick ascent or descent, setting the gimbal responsiveness to a faster speed can enhance the visual impact. Don’t forget to test these settings outdoors to find the right balance between control and creativity.
As you gain more experience with these adjustments, you’ll be able to capture stunning aerial footage that elevates your videography skills. Remember that practice is essential, and experimenting with different settings will lead you to discover the perfect configuration for your unique shooting style and environment.
Essential Tips for Perfecting Your MasterShot
MasterShots can elevate your drone photography and videography to new heights, enabling you to capture dynamic aerial footage with ease. However, to maximize the potential of this feature on your DJI drone, it’s essential to implement a few critical practices.
Begin by familiarizing yourself with the specific MasterShot modes available on your drone, such as Dronie, Circle, and Helix. Each mode serves a unique purpose and can create striking visuals when executed correctly. For instance, using the Dronie mode allows your drone to start close to your subject and gradually ascend while pulling away, offering a dramatic perspective. Ensure you’re selecting the appropriate mode based on the scene and story you want to convey.
Maintaining steady control during flight is crucial. Use the control stick sensitivity settings to adjust the responsiveness of your drone according to your comfort level-especially in challenging weather conditions or when flying in tight spaces. A slower response may be beneficial for general use, while advanced maneuvers can require a more sensitive touch. Additionally, practice flying in various environments to better understand how wind and obstacles can impact your shots.
Lighting is another critical factor in capturing perfect MasterShots. Aim to shoot during the golden hour-shortly after sunrise or before sunset-when the lighting is softer and more flattering. Avoid harsh midday sun, which can create unflattering shadows. Experiment with camera settings like ISO and shutter speed to adapt to changing light conditions, ensuring your footage remains crisp and vibrant.
Lastly, never underestimate the power of post-processing. Editing can enhance the quality of your MasterShots significantly. Use software that allows you to fine-tune colors, stabilize shaky footage, and add creative effects, elevating your final product. The mastery of shooting and editing will not only enhance your skills but help you develop a distinct style that will stand out in your drone videography portfolio.
Troubleshooting Common MasterShot Issues
When using MasterShot features on your DJI drone, encountering issues is not uncommon. Understanding and resolving these problems swiftly can save valuable time during your shooting sessions and help maintain your creative momentum. Common troubleshooting scenarios include issues with connectivity, unexpected behavior during flight, and insufficient video quality in captured footage.
To address connectivity problems, ensure your drone and remote controller are properly linked. Begin by restarting both devices and checking for any firmware updates. Outdated firmware can often lead to glitches or malfunctions. If a strong Wi-Fi connection is essential for your operation, consider flying in areas with minimal signal interference, as physical obstructions can disrupt connections.
Another common issue arises when the MasterShot modes don’t perform as expected. For instance, if your drone fails to execute a Dronie or Circle maneuver correctly, inspect the GPS signal strength. An unstable GPS connection can result in inaccurate positioning and erratic flight behavior. Always fly in open areas away from tall buildings or dense vegetation to ensure optimal GPS reception.
Lastly, if the quality of your videos isn’t meeting expectations, look into your camera settings. Factors such as frame rate, resolution, and ISO settings can significantly impact the final output. Shooting in lower light conditions might necessitate a higher ISO, but always balance this with the potential for noise in the footage. Performing a pre-flight checklist that includes verifying these settings can help avoid many common issues that arise during a shoot.
By systematically troubleshooting these potential issues, you can enhance your experience with MasterShot modes, ensuring smoother flights and better-quality footage. Taking the time to understand your drone’s capabilities and limitations will empower you to tackle challenges confidently as you hone your aerial cinematography skills.
Comparing MasterShot Features Across DJI Models
When diving into the world of drone videography, understanding the specific features of MasterShot across various DJI models can make a substantial difference in your creative output. DJI has integrated MasterShot capabilities into its drones, providing users with automated shooting techniques that elevate standard footage into impressive cinematic clips. Each model boasts unique features, and knowing these can help you choose the right tool for your project.
Different DJI drones implement MasterShot technology with varying degrees of sophistication. For instance, the Mavic series, particularly the Mavic Air 2 and Mavic 3, offer an advanced version of MasterShot that integrates more complex flight patterns and automatic editing features. This allows users to shoot a variety of predefined cinematic moves such as Dronie, Helix, and Circle, resulting in dynamic footage without requiring extensive pilot skills. In contrast, the Mini series, although lighter and more portable, comes equipped with a simplified version of MasterShot, which can still produce remarkable results but may limit some more advanced flight and filming options.
Key Feature Comparison
| DJI Model | MasterShot Features | Optimal Use Cases |
|---|---|---|
| Mavic Air 2 | Advanced MasterShot with multiple intelligent flight modes | Cinematic shots, travel vlogs |
| Mavic 3 | Professional-grade MasterShot, 5.1K video, enhanced obstacle avoidance | High-quality commercial projects, documentary filming |
| Mini 2 | Streamlined MasterShot functionality | Casual shooting, personal events |
Understanding the distinction in MasterShot capabilities can streamline your workflow and enhance your drone experience. For instance, if your emphasis is on automatic adjustments and preset cinematic sequences, the Mavic Air 2 or Mavic 3 offers more complex options that can simplify your editing process. On the other hand, if portability and user-friendliness are what you require, the Mini series could be the ideal choice without compromising too much on quality.
The introduction of firmware updates often enhances or expands MasterShot functionality across models. Regularly checking for updates can unlock new features or improve existing ones, thereby enriching your video production capabilities. Engaging with communities dedicated to DJI drones can provide insights and updates on how to maximize your use of these features, ensuring you’re at the forefront of drone videography technology. By tapping into the unique strengths of each model, you can strategize your drone usage effectively, tailoring your approach to different filming situations and maximizing your creative potential.
Understanding the Impact of Firmware Updates
Keeping your DJI drone’s firmware up-to-date is crucial for ensuring optimal performance and unlocking the latest features, particularly when it comes to MasterShot capabilities. Firmware updates not only enhance existing functionalities but also introduce new modes and settings that can dramatically improve your shooting experience. For instance, an update may refine the algorithms that control how your drone executes predefined cinematic moves, leading to smoother transitions and more professional-looking footage. Moreover, enhanced obstacle avoidance and improved stabilization technology often accompany these updates, reducing the risk of crashes and ensuring you capture flawless shots every time.
To make the most of your drone’s MasterShot capabilities, regularly check for firmware updates through the DJI Fly app or the DJI Assistant 2 software. The process is straightforward, typically involving a simple connection to your drone and following the on-screen prompts. Staying updated provides not just a performance boost but also keeps you in line with community standards, as new features can often alter how content creators approach shooting techniques.
Additionally, joining online forums or social media groups dedicated to DJI drones can provide insights into how specific updates have transformed the user experience for other pilots. User experiences often reveal practical tips and tricks that can be directly applied to your own flying practices. Engaging with other enthusiasts can also alert you to any issues related to new firmware, allowing you to navigate potential pitfalls before they impact your projects.
Embracing the updates as part of your routine not only leverages the full potential of your drone but also enhances your overall aerial creativity, enabling you to experiment with new flight paths and settings confidently. By investing time in understanding these updates, you set yourself up for success, ensuring that every MasterShot you create meets professional standards.
Best Practices for MasterShots in Various Environments
Flying a DJI drone to capture stunning MasterShots is an exhilarating experience, but the environment in which you operate can significantly influence the quality of your footage. Weather conditions, lighting, and terrain all play crucial roles, and knowing how to adapt your techniques can lead to breathtaking results.
To maximize your MasterShot potential, consider the following best practices tailored to various environments:
Weather Considerations
- Sunny Days: Bright conditions can create harsh shadows. Utilize graduated ND filters to balance light exposure and maintain details in both highlights and shadows.
- Overcast Skies: Cloudy weather softens light, perfect for reducing glare and capturing vibrant colors. Adjust your settings to slightly increase exposure to compensate for reduced sunlight.
- Windy Conditions: Ensure your drone is rated for wind resistance, and adjust your flight modes to maximize stability. Use a medium speed setting during windy conditions to reduce the risk of abrupt movements that can shake your footage.
Lighting Techniques
- Golden Hour: Shooting during dawn and dusk offers soft, natural lighting. Program your MasterShots to capture sweeping panoramas or focus on dynamic movements that showcase depth against a colorful backdrop.
- Nighttime Shooting: If your drone supports low-light modes, utilize them effectively. Experiment with longer exposure settings or integrate low-light MasterShot capabilities to create smooth movement without excessive grain.
Terrain Adaptation
- Urban Areas: Capture the essence of cityscapes with vertical MasterShots. Utilize your drone’s obstacle avoidance features to navigate safely around buildings while executing perfect shots.
- Natural Landscapes: Explore wide-angle perspectives to emphasize the vastness of the environment. Use a combination of MasterShot modes that allow for circling around natural features, showcasing terrain transitions fluidly.
By adapting your MasterShot strategies to align with environmental factors, you empower yourself to create footage that not only looks professional but also captures the unique characteristics of each setting. Whether you’re flying over urban terrains or exploring remote landscapes, your awareness of these best practices will allow you to effectively leverage your drone’s capabilities and enhance every shot.
Enhancing MasterShots with Creative Techniques
To elevate your MasterShot creations beyond the standard offerings, embracing creativity in your approach can lead to stunning, engaging footage that captivates viewers. Experimenting with dynamic movements, strategic framing, and unique visual techniques can transform your aerial photography and videography, providing a professional edge that sets your work apart.
One effective method is to leverage your drone’s intelligent flight modes creatively. For instance, while the drone is executing a MasterShot, consider adding in your own manual adjustments, such as changing the altitude or rotational angle mid-shot. This technique can create a more cinematic effect and add depth to your footage. Moreover, combining different MasterShot modes in a single flight can yield diverse visual narratives. For example, you might start with an “Ascend” shot, transition into a “Circle” around a subject, and finish with a “Dolly” to emphasize depth. This encourages viewers to engage with the entire scene rather than just isolated clips.
In addition to movement, focus on lighting and composition to enhance your MasterShots. Utilize natural lighting to your advantage, shooting at various times of day for different moods. The golden hour, right after sunrise or just before sunset, offers soft light perfect for capturing colors beautifully. Pair this with thoughtful composition techniques, such as the rule of thirds, to draw viewers’ attention to key focal points. Remember to include foreground elements that add context and interest, enriching the viewer’s experience.
Lastly, exploring post-processing techniques is invaluable in refining your footage. Using editing software, you can adjust color grading, stabilize clips, or incorporate slow-motion effects to highlight specific actions. Engaging with your footage on a deeper level through editing allows you to craft a storytelling arc that showcases your aerial storytelling prowess. By integrating these creative techniques into your MasterShot workflow, you’ll not only improve your skills but also captivate your audience with dynamic and visually stunning aerial footage.
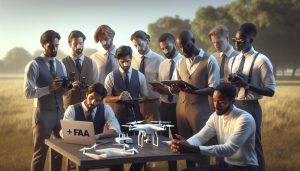
Legal Considerations When Using MasterShots
Navigating the regulatory landscape is essential for safely using MasterShots with your DJI drone, as compliance with local laws can significantly affect your flying experience and legal standing. It’s crucial to understand that flying a drone isn’t just about the technology; it also involves adhering to regulations set forth by aviation authorities. For instance, in many regions, you must register your drone if it exceeds a specific weight, often around 250 grams. This registration process is a prerequisite for legal flying and ensures that you are accountable for any actions taken while piloting your drone.
Additionally, airspace restrictions play a critical role in where and how you can capture MasterShots. Many urban areas and near airports have specific no-fly zones that you must respect. DJI drones typically come equipped with geofencing technology that alerts you to restricted areas, but it’s your responsibility to remain informed about any temporary airspace restrictions due to events or emergencies. Thoroughly researching airspace regulations, such as those outlined by the FAA in the United States or EASA in Europe, before you take flight can save you from potential fines and legal disputes.
Privacy Considerations
When using your DJI drone to capture stunning aerial footage, it’s also vital to be mindful of privacy laws. Filming over private property or in populated areas can lead to infringing on people’s privacy rights, potentially resulting in legal action against you. Always obtain consent from individuals or property owners if your plans include capturing their premises or people. Moreover, consider the ethical implications when sharing your content online, as it can lead to unintended consequences. Avoid any footage that could compromise someone’s privacy or safety.
Ultimately, to responsibly use MasterShots, you should stay informed about the evolving legal landscape concerning drone usage. Regularly check for updates to local regulations, as rules and laws may change or be introduced. Maintaining an open dialogue with local aviation authorities and consulting legal experts in drone regulations can bolster your understanding and compliance. Remember, being a responsible drone operator not only enhances your flying experience but also contributes to the overall reputation of the drone community.
Accessories to Improve Your MasterShot Experience
To elevate your MasterShot experience with DJI drones, the right accessories can make a significant difference in both functionality and creativity. Whether you’re a hobbyist looking to enhance your aerial photography or a professional seeking advanced capabilities, certain tools can take your shots to the next level.
One crucial accessory is ND filters (Neutral Density filters). These filters help manage light exposure, allowing for smoother motion blur during dynamic shots. By reducing the amount of light entering the camera, ND filters enable you to maintain ideal shutter speeds, which is particularly useful when shooting in bright conditions. This can result in more cinematic footage, especially valuable during sunset or sunrise when lighting conditions change rapidly.
Another essential accessory is an extra battery. MasterShots often require more power due to their advanced filming techniques. Having additional batteries on hand can extend your flying time, allowing you to capture more footage without the need to land and recharge. Pairing this with a multi-battery charging station can streamline your workflow, ensuring that you’re ready to shoot whenever inspiration strikes.
Additionally, consider investing in a gimbal stabilizer if you’re looking to achieve ultra-smooth footage. While DJI drones come with integrated stabilization, a dedicated gimbal can further minimize vibrations and jolts, providing a polished look to your videos. For drone operators capturing fast-moving subjects or performing complex maneuvers, this added layer of stability can make all the difference.
Finally, don’t overlook storage solutions such as high-capacity microSD cards. MasterShots can eat through storage quickly, especially when capturing high-resolution footage. Opt for cards with fast read/write speeds to ensure that your drone can handle the demands of continuous recording without lag or interruptions.
Equipped with these accessories, your MasterShot experience can significantly improve, allowing you to explore creative possibilities and push the boundaries of what your DJI drone can achieve.
Advanced MasterShot Strategies for Professionals
Mastering the art of creating stunning aerial footage with a DJI drone’s MasterShot feature can elevate your videography to professional standards. Professionals looking to refine their skills and take full advantage of MasterShot’s capabilities can incorporate advanced strategies that go beyond basic operation. One essential approach is to understand how to customize the shooting parameters based on your environment and desired outcome.
For instance, when filming in low-light conditions, adjusting your ISO settings can help maintain image quality. Lowering the ISO reduces noise and can result in clearer footage, especially in dusk or dawn scenarios. In bright conditions, pairing this with the use of ND filters allows you to achieve a gradual motion blur for a cinematic feel. This advanced control over exposure settings empowers creators to experiment with various artistic effects, moving dynamically between sharp and soft shots.
Utilizing Flight Patterns
Another advanced strategy involves leveraging predefined flight patterns for more complex compositions. MasterShot allows for various modes such as “Dronie,” “Circle,” or “Boomerang,” which can be fine-tuned for timing and speed. Experiment with manual adjustments to the drone’s altitude and speed during these shots to achieve unique perspectives. A combination of different flight patterns can also create a more sophisticated edit, helping tell a richer visual story by guiding the audience through the scene.
Post-Production Integration
Lastly, don’t underestimate the power of post-production in enhancing your MasterShot footage. Utilizing editing software to tweak color grading and stabilization can significantly improve the final outcome. High-quality drones like the Mavic and Phantom series produce incredible raw footage that benefits from thoughtful editing. A balanced approach to both the shooting and post-production phases ensures that every shot aligns perfectly with your artistic vision, pushing the boundaries of what can be achieved with drone technology.
By applying these advanced strategies, professionals can not only enhance their MasterShot capabilities but also inspire creativity and innovation in every project, ultimately leading to more compelling narratives and stunning visuals.
FAQ
Q: How do I access MasterShot settings on my DJI drone?
A: To access MasterShot settings, power on your DJI drone and connect to the DJI Fly app. Go to the camera view and select the MasterShot feature from the modes. From there, you can adjust settings based on your desired flight path and camera preferences.
Q: What are the different modes available in MasterShot on DJI drones?
A: MasterShot on DJI drones includes several modes such as Dronie, Rocket, Circle, and Helix. Each mode provides a unique automatic flight path and camera angle for capturing dynamic cinematic shots, allowing for creative aerial photography.
Q: Can I customize the flight path in MasterShot mode?
A: Yes, in MasterShot mode, you can customize flight paths by adjusting the starting point, altitude, and direction. Experimenting with these settings can enhance your aerial shots and make them more interesting.
Q: What should I do if my MasterShot feature is not functioning?
A: If MasterShot isn’t working, ensure your drone’s firmware is updated. Check the app for permissions and settings, and restart both the drone and the app. For persistent issues, refer to the troubleshooting section of your manual for specific error codes.
Q: How does lighting affect MasterShot results?
A: Lighting significantly impacts MasterShot outcomes. Ideal conditions are during golden hours (early morning or late afternoon) to minimize harsh shadows and enhance colors. Consider adjusting the camera settings to adapt to various lighting situations.
Q: How can I improve the quality of my MasterShot videos?
A: To improve MasterShot video quality, ensure you have sufficient battery life and a clear memory card. Use ND filters to control exposure, and choose stable flying conditions to prevent jerky footage. Practice different modes to see which yields the best results.
Q: Are there any legal considerations when using MasterShot?
A: Yes, legal considerations include adhering to local drone flight regulations, maintaining visual line of sight, and avoiding restricted areas. Always check airspace rules and obtain necessary permissions, especially when flying in populated or sensitive regions.
Q: What accessories enhance MasterShot performance?
A: Accessories like ND filters, extra batteries, and smartphone mounts can enhance MasterShot performance. ND filters improve image quality in bright conditions, while additional batteries ensure longer flight times for capturing more footage.
To Wrap It Up
Now that you’ve learned how to change the MasterShot modes and settings on your DJI drone, you’re well on your way to capturing stunning aerial footage and enhancing your creative projects. Remember, experimenting with different modes can unlock unique perspectives in your videos. For further mastery, don’t miss our in-depth guides on drone setup and gimbal calibration, or check out our tips for safe indoor flying to elevate your piloting skills even further.
Ready to take your skills to the next level? Subscribe to our newsletter for exclusive insights, or explore our product reviews for the latest DJI technology. Join the conversation in the comments below-share your experiences or any questions you might have, and let’s help each other become better drone operators! Your next great shot is just a MasterShot away!