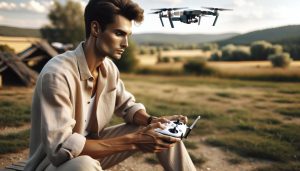
Unlock the full potential of your DJI Mini 3 by mastering the art of changing MasterShots-an essential feature that enhances your aerial photography and videography skills. Whether you’re looking to capture stunning cinematic shots or simply elevate your hobby, understanding these creative flight modes can transform your drone experience. With intuitive controls, the Mini 3 empowers both novice flyers and seasoned professionals to effortlessly create breathtaking content and explore new perspectives. In this guide, we’ll delve into how to seamlessly navigate and utilize MasterShots, ensuring you make the most of your drone’s capabilities. Ready to elevate your aerial storytelling? Let’s take flight!
How MasterShot Works on DJI Mini 3

MasterShot transforms the way you capture stunning aerial footage using the DJI Mini 3, automating complex flight routines and allowing for creative exploration without the steep learning curve associated with traditional videography. By leveraging this feature, pilots can easily produce cinematic shots, and the intuitive interface guides users through various flight modes tailored for different creative outcomes.
To activate MasterShot, simply power on your DJI Mini 3 and open the DJI Fly app. Select the “MasterShot” option from the main menu. This selection will prompt the drone to automatically analyze the environment and suggest the best shots based on your location. You’ll find pre-configured flight modes designed for specific scenarios-such as “Rocket,” where the drone ascends while tilting the camera down, or “Dolly Zoom,” which enables dynamic camera zooming while maintaining subject focus. Choose your desired mode, set your subject, and with just a press of the record button, MasterShot takes care of the rest.
Don’t overlook the value of understanding how each creative flight mode interacts with your shooting environment. For example, in open areas, wide-angle shots lend themselves to the aerial perspective MasterShot provides, while in crowded spaces, agility and precision become paramount. This adaptability not only broadens your filming capabilities but also encourages you to explore various forms of visual storytelling through aerial imagery.
As you become more comfortable with MasterShot, consider experimenting with different modes and settings to discover your unique style. Embracing this innovative feature will undoubtedly elevate your drone cinematography, making your videos stand out while honing your piloting skills simultaneously.
Step-by-Step Guide to Accessing MasterShot

To unlock the creative potential of MasterShot on your DJI Mini 3, accessing this innovative feature is straightforward and intuitive. First, ensure your drone is fully charged and that you have the DJI Fly app downloaded on your compatible smart device. This application serves as the control center for your drone, providing a seamless interface for accessing various features, including MasterShot.
Start by powering on your DJI Mini 3. Wait for the drone’s systems to initialize, and allow it to establish a connection with your smart device. Once you’re connected, launch the DJI Fly app. From the main menu, look for the “MasterShot” option; it typically sits alongside other flight modes. Tap on this selection, and the app will automatically analyze your surroundings, identifying the best possible shots based on the area you are filming. This automatic assessment helps you choose from a variety of creative flight modes tailored to enhance your filming experience.
After selecting the desired MasterShot option, you’ll be prompted to set your subject. This is a crucial step, as MasterShot is designed to enhance the focus of your shots, ensuring that your subject remains in frame while the drone executes the selected flight path. Once your subject is set, simply press the record button. The MasterShot feature will take over, executing the flight pattern while capturing stunning footage without requiring advanced piloting skills.
Remember, the key to obtaining the best results from MasterShot lies in familiarizing yourself with its functionalities. Consider practicing in different environments to understand how each mode performs under various conditions. By doing so, you’ll not only improve your proficiency with the DJI Mini 3 but also unlock new creative avenues for aerial storytelling. Engaging with this feature thoughtfully can significantly elevate both your filming capabilities and your enjoyment of drone flying.
Exploring Creative Flight Modes for Stunning Videos

The DJI Mini 3’s MasterShot feature offers a range of creative flight modes designed to elevate your videography skills and help you capture stunning footage with minimal effort. Each of these modes is tailored to achieve specific cinematic effects, allowing both beginners and seasoned pilots to produce professional-quality clips. Whether you’re filming sweeping landscapes, dynamic action shots, or personal events, understanding how to leverage these creative flight modes can dramatically enhance your storytelling capabilities.
One of the standout features of MasterShot is its automated flight patterns, which intelligently adapt to the surroundings. For instance, the “Dronie” mode pulls back and ascends, creating a breathtaking overview of your subject and scenery-perfect for establishing shots. If you’re looking to add a touch of drama to your footage, consider using the “Circle” mode, which orbits around your subject, providing captivating perspectives that can highlight and frame your subject beautifully. Each mode works seamlessly to keep your subject in focus while the drone executes complex maneuvers, freeing you to concentrate on framing the shot.
To get the most out of these creative modes, make sure to experiment with different settings based on your project’s requirements. For example, in “Rocket” mode, the drone rises straight up while pointing its camera downward, which is ideal for capturing landscapes or tall structures. Conversely, if you wish to create a more intimate atmosphere, “Fade Away” can pull back to show your subject in relation to their environment. Utilizing these creative flight modes not only simplifies the capturing process but also adds an artistic flair to your videos that can impress viewers.
In addition to using these modes effectively, it’s essential to consider the lighting and composition of your shots. Drones like the Mini 3 are equipped with advanced sensors and stabilization features, but being aware of your surroundings-such as wind direction and sunlight-will always help you achieve better results. By combining the capabilities of MasterShot with awareness of environmental conditions, you can unlock your full creative potential and take your drone videography to exciting new heights.
Tips for Choosing the Right Creative Mode
Choosing the right creative mode on the DJI Mini 3 can drastically influence the quality and style of your footage. Each mode within the MasterShot feature is designed to achieve different cinematic effects, making it essential to select one that aligns with your vision and the specific conditions of your shoot. Understanding the nuances of each available mode allows both amateurs and experienced pilots to elevate their videography skills effectively.
To begin, consider the subject matter and the story you want to tell through your footage. For instance, if you aim to showcase a majestic landscape, opting for the “Dronie” mode can create a stunning overview as the drone ascends while capturing the view. Conversely, if your subject is engaged in action, such as a thrilling sports event, the “Circle” mode will effectively highlight the action from a dynamic perspective by orbiting around the subject.
Another crucial aspect to remember when selecting a mode is the environmental context. Factors like lighting conditions and the surrounding topography play a significant role in how well a particular mode will perform. For example, during golden hour when the sun is low, the “Rocket” mode can capture stunning downward shots and provide contrast with the warm light, amplifying the drama of the scene. On the other hand, in environments with obstacles or unpredictable winds, modes that require more linear movement may entail a higher risk of collision.
When making your choice, also think about the emotional tone you wish to convey. If you’re capturing a heartwarming family gathering, “Fade Away” mode gently pulls back, giving viewers perspective on the scene, which can enhance the emotional connection. To keep your audience engaged, experimenting with different modes based on both creative intent and practical situations can help you uncover unique visual storytelling opportunities. By blending these considerations, you can confidently select the most suitable creative mode for your DJI Mini 3, resulting in more polished and captivating videos.
Customizing Your MasterShot Settings
Customizing the settings in MasterShot on the DJI Mini 3 can significantly enhance your creative possibilities and ensure that your videos capture the intended mood and atmosphere. The MasterShot feature is designed for versatility, allowing you to tailor various settings to match the scene you wish to create.
To get started, navigate to the MasterShot menu on your DJI Fly app, where you will find several options to adjust your footage. Here’s a quick guide to some of the key settings you can customize:
- Flight Speed: Tailor the drone’s speed to match your filming style. Slow speeds are optimal for capturing delicate movements, while faster speeds can create an adrenaline-pumping effect in action sequences.
- Camera Direction: You can choose whether the camera focuses on the subject or showcases the surrounding landscape. This setting is crucial for storytelling-determining whether the scene is about the subject’s actions or the environment.
- Altitude Options: Adjust the flying altitude to gain creative angles. Higher altitudes can reveal vast landscapes, while lower heights can help capture intimate details of the setting.
- Frame Rate and Resolution: Set the highest resolution for crystal-clear footage; however, consider the frame rate that best fits your vision. A higher frame rate may be beneficial for slow-motion sequences.
After making these adjustments, it’s advisable to conduct a few test flights to observe how these settings interact with different modes like “Dronie,” “Circle,” or “Rocket.” Each mode responds uniquely to the customized parameters, so experimenting will help you determine the ideal settings for your specific shooting situation.
Moreover, keeping environmental factors in mind-such as wind conditions and lighting-will enhance the effectiveness of your settings. For example, reducing the flight speed and altitude on windy days can help maintain stability while capturing smooth and professional-looking footage. By taking the time to customize your MasterShot settings, you’ll be well on your way to producing stunning aerial videos that showcase your creative intent and skill as a drone operator.
Avoiding Common Mistakes in MasterShot
The joy of mastering aerial videography with the DJI Mini 3 can easily be dampened by common pitfalls encountered with the MasterShot feature. Ensuring that your footage is both stunning and stable requires a keen understanding of these missteps. In the excitement of capturing breathtaking shots, many operators encounter a few recurring mistakes that can hinder their filming experience.
One prevalent error is neglecting to pre-check environmental conditions before takeoff. Windy days might be exciting for flying but can wreak havoc on the stability of your shots, especially when using creative flight modes. Prior to launching, assess the wind speed and direction; light breezes might be manageable, but strong gusts can make even the simplest maneuvers challenging. Moreover, low light conditions can affect the quality of your footage, so ensure that you maintain adequate lighting to enhance visibility and maintain sharpness.
Another common mistake is failing to adjust settings according to the specific MasterShot mode in use. Each mode-whether it’s “Rocket,” “Dronie,” or “Circle”-operates differently and requires tailored settings for optimal results. For example, when using the “Dronie” mode, it’s essential to set the altitude and camera angle to adequately capture the subject in a dramatic ascent. If the camera angle is too wide or the altitude too low, the effect may be diluted, resulting in less impactful footage. Test your settings beforehand to ensure the selected parameters complement the predefined flight paths.
Lastly, many drone operators overlook the importance of post-flight review. After a shoot, analyze your footage to pinpoint any missed opportunities for improvement. Were there moments when the drone’s movements felt jerky? Did the lighting change dramatically Mid-shot? Keeping a consistent checklist for review can not only highlight areas for technique improvement but also enhance your creative process for future shoots.
By proactively addressing these mistakes, you can elevate your drone piloting skills and maximize the creative potential of the MasterShot feature on the DJI Mini 3. Engaging fully with your environment and settings will empower you to produce mesmerizing aerial footage that truly captures your artistic vision.
Essential Tips for Airborne Creativity
Harnessing the full potential of your DJI Mini 3’s MasterShot capabilities requires not just a grasp of the technical aspects but a creative mindset. The beauty of aerial videography thrives on innovation, so understanding how to utilize the diverse flight modes effectively can set your footage apart. Here are some essential tips to elevate your airborne creativity using MasterShot.
First, familiarize yourself with the distinct features of each creative flight mode available in MasterShot. Options like “Dronie,” “Rocket,” and “Circle” each offer unique perspectives that can dramatically alter the narrative of your shots. For instance, when opting for a “Dronie,” consider the placement of your subject relative to the horizon; this effect pulls viewers back, creating a sense of scale and context. Similarly, the “Circle” mode can be employed to draw attention to a subject in motion, allowing the drone to orbit around it gracefully. Take the time to plan your shots by visualizing the story you want to tell and determining how each mode can serve that vision.
Additionally, don’t underestimate the power of environmental factors in enhancing your footage. Lighting plays a crucial role; filming during the “golden hour”-shortly after sunrise or before sunset-can imbue your videos with soft, warm tones and long shadows, making everything look more cinematic. On the flip side, be mindful of potentially distracting elements in your surroundings that could detract from your shot. Use natural frames, such as tree branches or buildings, to guide the viewer’s eye and create depth in your composition.
Experimentation is a vital part of improving your drone skills. Spend a session simply trying out different speed settings within MasterShot modes; a slower speed might yield smoother footage that can be more dynamically engaging. Also, consider introducing movement into your planning. Adding a subtle yaw or tilt can transform a flat static shot into a more compelling one. Capturing varying altitudes with the drone can present familiar scenes from new perspectives, offering fresh visuals that enhance the story you are telling.
In summary, being creative with your DJI Mini 3’s MasterShot isn’t just about choosing the right flight mode-it’s also about how you plan, frame, and experiment with your shots. Keep an eye out for lighting, take advantage of environmental features, and never stop exploring different techniques. Your creativity and willingness to take risks will ultimately define the uniqueness of your aerial videography.
Improving Your Drone Skills with Advanced Techniques
When it comes to mastering aerial videography, enhancing your drone skills through advanced techniques is invaluable. As you familiarize yourself with the DJI Mini 3’s MasterShot capabilities, integrating a series of strategic approaches can help elevate your filming game, ensuring you produce visually stunning content that stands out.
One effective method is to experiment with different gimbal settings. By adjusting the tilt and yaw during flight, you can create dynamic, cinematic movements that add a layer of professionalism to your footage. Consider implementing a slow pan during a MasterShot sequence. This technique can transform the view, providing context and movement to still shots, thus capturing the viewer’s attention more effectively.
Utilizing pre-programmed waypoints is another advanced technique to enhance your shots. Setting specific points for the drone to navigate allows for intricate flight patterns, especially when combined with the MasterShot modes like “Rocket” or “Circle.” This not only facilitates consistency in capturing complex scenes but also aids in executing unique transitions between different vantage points, enhancing the storytelling aspect of your videos.
Moreover, integrating weather and local topography can significantly improve your drone footage. For example, switching to ND filters during bright days or overcast conditions can help manage exposure, allowing for smoother footage and more vibrant colors. This adjustment can be especially useful in modes like “Dronie,” where the background plays a crucial role in conveying narrative depth.
Lastly, don’t shy away from practice flights. Regularly revisiting various MasterShot modes helps solidify your understanding of each’s potential. Consider allocating specific sessions purely for experimenting with speed settings and flight patterns. This not only boosts your confidence but also enables you to come up with creative approaches to familiar scenarios, turning the mundane into something magical.
Key Techniques for Mastering Aerial Shots
- Gimbal Adjustments: Experiment with tilt and yaw for cinematic effects.
- Waypoints Navigation: Set predefined flight paths for complex sequences.
- Weather Considerations: Use ND filters to manage exposure on bright days.
- Regular Practice: Schedule flights exclusively for experimenting with various modes.
Incorporating these advanced techniques not only enhances your drone skills but also transforms your aerial footage into captivating storytelling instruments, ensuring that your visuals resonate profoundly with your audience.
Comparing MasterShot with Other Flight Modes
When exploring the capabilities of the DJI Mini 3, understanding how MasterShot compares to other flight modes can significantly enhance your filming experience. Each mode is designed to serve specific creative needs, making it crucial to choose the right one based on the type of shot you’re aiming to achieve.
MasterShot stands out by automating complex shots with precision, allowing users to focus more on creativity and less on manual navigation. This mode captures multiple clips in one seamless flight, incorporating diverse cinematic techniques like “Rocket,” “Dronie,” and “Circle.” These pre-programmed maneuvers result in high-quality footage that tells a story and adds a professional flair to your projects. Its user-friendly interface makes it particularly appealing for beginners and casual users who seek hassle-free filming.
In contrast, other flight modes, such as QuickShots, are more targeted and typically simpler. For instance, while QuickShots like “Circle” and “Dronie” perform single, isolated maneuvers, they lack the breadth of MasterShot’s capability to combine several techniques into one flight path. This specialization can be useful for capturing specific moments or scenarios but misses out on the intricate storytelling that MasterShot achieves through a series of coordinated aerial moves.
For seasoned pilots looking to elevate their skills, the Tripod mode offers a high level of control and precision. While it doesn’t automate the shot creation process as MasterShot does, it allows for detailed manual adjustments in movement and speed, which can yield stunning results when combined with gimbal settings. However, this mode requires more practice and knowledge of piloting to utilize effectively.
Quick Comparison of Flight Modes
| Flight Mode | Automation | Complexity | Best Use Case |
|---|---|---|---|
| MasterShot | High | Easy | Cinematic sequences with multiple shots |
| QuickShots | Moderate | Easy | Single, isolated maneuvers |
| Tripod | None | Advanced | Precise filming in controlled environments |
Ultimately, the choice between MasterShot and other flight modes hinges on your creative vision and level of expertise. MasterShot is ideal for those looking to create compelling, story-driven footage without extensive piloting experience, while other modes provide opportunities for more nuanced control and specific artistic expressions. Understanding these distinctions will help you select the mode that best aligns with your project’s goals, enabling your aerial photography and videography to reach new heights.
Troubleshooting MasterShot Issues on DJI Mini 3
MasterShot mode on the DJI Mini 3 is designed to streamline aerial videography, but like any advanced technology, it can encounter issues that hinder its performance. Understanding these common problems and their solutions can enhance your creative experience and ensure you capture stunning footage every time you fly.
One frequent issue is connectivity problems between the drone and the remote controller or the DJI app. This can manifest as a weak signal or the MasterShot feature being unresponsive. To address this, ensure that both the drone and the remote controller are fully charged and that you are within a reasonable distance from the drone. If connectivity issues persist, try restarting both the drone and the controller. Additionally, verify that you have the latest firmware installed, as updates can resolve bugs that may affect functionality.
Another common hurdle is poor quality footage or shaky results when using MasterShot, which can occur due to high winds or unsteady flying conditions. To mitigate this, always check the weather before your flight – try to shoot on days with minimal wind and stable atmospherics. If you encounter unpredictable conditions while filming, consider switching to Tripod mode for increased stability, although it will require more manual control.
Sometimes, users may find that the drone fails to execute the selected MasterShot maneuvers correctly. This is often due to obstacles in the environment. Ensure that your chosen filming location is clear of tall structures and trees that may interfere with the drone’s flight path. Before initiating MasterShot, scan for obstacles directly through the app’s live feed and adjust your starting position as needed.
Finally, if you’re experiencing unexpected crashes or abrupt halts during a MasterShot sequence, this may indicate a need for calibration of the drone’s gimbal and IMU. Regularly calibrating these components can improve the drone’s responsiveness and filming accuracy. Calibration instructions can be found in the user manual or DJI app, where you can also access firmware updates and additional troubleshooting guides.
By anticipating these potential issues and knowing the solutions, you can make the most of MasterShot mode on your DJI Mini 3 and focus more on capturing breathtaking aerial footage without worrying about technical glitches.
Inspiring Examples of MasterShot Footage
Utilizing the MasterShot feature on the DJI Mini 3, enthusiasts and professionals alike can capture breathtaking aerial footage that rivals cinematic productions. MasterShots automates a sequence of predefined flight patterns, allowing users to create dynamic shots with minimal effort. From showcasing landscapes to highlighting events, the possibilities are only limited by your creativity and environment.
Many creators have taken advantage of MasterShots to enhance their storytelling. For instance, a travel vlogger might use the “Rocket” flight path to dramatically elevate above a stunning mountain panorama at sunrise, emphasizing the vastness and beauty of nature. Similarly, during a wedding shoot, employing the “Circle” maneuver around the couple can create a romantic and immersive atmosphere-perfect for capturing a memorable moment that showcases both the couple and the picturesque surroundings.
Here are some inspiring examples of how MasterShot can transform your footage:
- Landscapes: Capture sweeping vistas by utilizing the “Dronie” mode, which starts close and then flies away, revealing the grandeur of someone hiking or exploring.
- Events: For weddings or parties, the “Asteroid” effect wraps up the day by pulling back dramatically while orbiting around the scene, providing a stunning finale.
- Architecture: Showcase urban architecture with the “Fade Away” feature, which begins at ground level before rising to reveal an entire cityscape, blending artistic vision with technical precision.
When planning to shoot with MasterShot, consider scouting locations beforehand that lend themselves to enhancing the intended effect. Pay attention to natural lighting, terrain, and surrounding structures, which can elevate the quality of your footage. With the right approach, MasterShot can serve not just as a tool for beginners but also provide seasoned pilots with creative ways to expand their artistic repertoire.
Frequently Overlooked Features in MasterShot
The MasterShot feature on the DJI Mini 3 includes several powerful capabilities that often go unnoticed by operators eager to capture stunning aerial footage. One frequently overlooked feature is the ability to tweak the speed of the flight path. By adjusting the speed settings, users can cater the shooting style to the activity being filmed, whether it’s a fast-paced sports event or a tranquil nature scene. Slowing down the flight allows for smoother transitions, resulting in more cinematic shots that are visually appealing and engaging.
Another underappreciated aspect is the option to customize the altitude at various points during the MasterShot sequence. This can lead to creative transitions that add depth and dynamism to the video. For instance, starting at a lower altitude and gradually ascending during a ‘Dronie’ shot creates a captivating visual effect that showcases both the subject and the expansive landscape surrounding it. Understanding how to harness this capability can elevate the production quality of the footage significantly.
Additionally, many users overlook the potential of incorporating sound into their MasterShot sequences. While the focus is often on the visuals, pairing the right music or natural sounds with aerial footage is crucial for storytelling. Recording ambient sounds during the flight can be as simple as using a smartphone nearby or capturing the drone’s onboard audio. This can provide an authentic touch to the final edit and enhance viewer engagement.
Lastly, users often miss out on the benefits of reviewing their footage immediately after each flight. The DJI Fly app allows for quick playback of captured videos, helping to identify what worked and what could be improved for next time. Taking this moment to reflect can provide valuable insights into better mastering flight modes and adjusting settings for future projects. By leveraging these frequently overlooked features, operators can maximize their creative output and enhance their overall experience with the MasterShot on the DJI Mini 3.
Q&A
Q: How do I switch between different MasterShot modes on the DJI Mini 3?
A: To change MasterShot modes on the DJI Mini 3, access the camera settings in the DJI app. Select the MasterShot icon, then choose your desired mode from the available options, such as “Rocket,” “Circle,” or “Dronie.” This allows for diverse aerial maneuvers tailored to your creative vision.
Q: Can I customize the settings for MasterShots in the DJI Mini 3?
A: Yes, you can customize MasterShot settings using the DJI Fly app. After selecting a MasterShot mode, tap on settings to adjust parameters like flight height, distance, and speed to suit your filming requirements. This flexibility enhances the final output of your aerial footage.
Q: What should I consider when selecting a MasterShot mode?
A: Consider the subject and the desired cinematic effect. For instance, “Rocket” works well for showcasing height, while “Circle” offers smooth movement around an object. Evaluate the environment and lighting conditions to maximize the effectiveness of your selected mode.
Q: Are there any common mistakes to avoid when using MasterShot on the DJI Mini 3?
A: Yes, common mistakes include flying too close to obstacles and not considering wind conditions. Always ensure a clear path for the drone and check the mission area beforehand. This precaution helps avoid potential crashes and ensures successful captures in MasterShot mode.
Q: How can I enhance my skills in using MasterShot modes?
A: To improve your MasterShot skills, practice regularly in various environments. Analyze example footage from experienced users and experiment with different settings. Watching tutorials, like those available on platforms such as YouTube, can also provide valuable insights and tips.
Q: How do I troubleshoot issues with MasterShots on the DJI Mini 3?
A: If you encounter issues with MasterShots, first check for firmware updates in the DJI Fly app. Ensure the drone’s sensors are functioning properly and avoid using MasterShot in windy conditions. If problems persist, resetting the drone may resolve software glitches.
Q: What are some unique features of the MasterShot on the DJI Mini 3?
A: Unique features of MasterShots include automatic obstacle avoidance and intelligent framing tools, which help capture stunning aerial footage effortlessly. This built-in intelligence allows for smoother operation and creativity, enhancing the overall filming experience.
Q: Where can I find inspirational examples of MasterShot footage?
A: You can find inspiring MasterShot footage by exploring video platforms like YouTube or visiting drone enthusiast forums. Channels dedicated to DJI drones often showcase creative uses of MasterShot, offering ideas for your projects and flight patterns.
To Wrap It Up
Now that you’ve mastered how to change the MasterShot modes on your DJI Mini 3, it’s time to elevate your aerial photography and videography. Experiment with these creative flight options to make your footage stand out and capture stunning cinematic sequences. Don’t forget, continuous practice makes perfect, so head out and start flying today!
For even more tips on optimizing your drone experience, check out our guides on advanced flight modes and troubleshooting common issues. If you find value in our tutorials, consider signing up for our newsletter to stay updated on the latest drone insights and tips. Your next amazing flight awaits-keep exploring new creative possibilities with your DJI Mini 3!