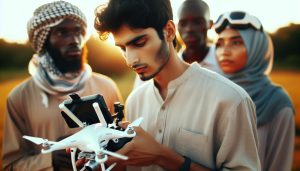
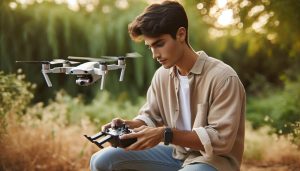
Unlocking the full creative potential of the DJI Mini 3 Pro starts with mastering its various shooting modes, particularly the MasterShot feature. This advanced capability enables you to capture stunning, cinematic footage effortlessly, regardless of your flying skill. Whether you’re a hobbyist aiming to elevate your content or a professional seeking to streamline your workflow, knowing how to switch between MasterShot modes can be a game-changer.
Imagine effortlessly producing compelling videos that capture attention and tell stories, all while focusing on your artistic vision rather than technical complexities. In this guide, we’ll delve into the intricacies of changing MasterShot modes, providing you with expert tips to enhance your filming techniques. Stay tuned as we explore how to make the most of this powerful feature, ensuring your aerial adventures are not just memorable but truly breathtaking.
Understanding the MasterShot Feature on DJI Mini 3 Pro
MasterShot is a standout feature of the DJI Mini 3 Pro, designed to simplify the cinematic shooting process while enhancing the creative capabilities of the drone. This intelligent shooting mode allows pilots to capture a stunning array of dynamic footage with minimal effort, employing pre-programmed flight paths and camera movements that highlight the subject beautifully. Whether you’re shooting a landscape or a lively event, MasterShot utilizes complex maneuvers to create professional-looking results that meet the expectations of both hobbyists and seasoned filmmakers.
When delving into the MasterShot feature, understanding its various pre-set options is crucial. The Mini 3 Pro offers different shooting styles, such as Circle, Dronie, and Rocket, each tailored to achieve a specific effect. For instance, the Circle mode encompasses a circular flight path around the subject, providing a comprehensive view of the surroundings and adding a dynamic touch to your footage. By leveraging these pre-defined patterns, users can concentrate on composing their shots rather than worrying about technical flying maneuvers.
Furthermore, the integration of AI within the MasterShot feature optimizes the shooting process. The system analyzes the scene and automatically adjusts parameters like altitude and distance to ensure the best possible framing. This not only streamlines production time but also allows pilots to focus on creative vision rather than manual adjustments. Just imagine capturing breathtaking videos with smooth transitions and stunning perspectives, all while maintaining a stable flight, thanks to the Mini 3 Pro’s advanced stabilization technology.
In summary, grasping the ins and outs of the MasterShot feature is essential for any DJI Mini 3 Pro operator looking to produce high-quality video content. By understanding the various shooting modes and relying on the drone’s intelligent capabilities, users can elevate their aerial cinematography skills and create videos that captivate and engage audiences.
Essential Settings for Optimal MasterShot Performance
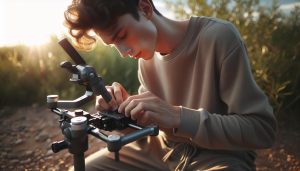
To take full advantage of the MasterShot feature on the DJI Mini 3 Pro, it’s essential to configure your settings to achieve optimal performance. Getting these settings right not only enhances the quality of your footage but also eases the shooting process, allowing you to focus more on creativity than on technicalities.
Start by ensuring that your drone’s firmware is up to date. Regular updates from DJI often include enhancements and bug fixes that can improve shooting modes. After updating, go into the settings menu and confirm that you are using the latest version to access all the features specific to MasterShots.
Next, adjust the resolution and frame rate according to the intended use of your footage. For most cinematic experiences, shooting in 4K at 30fps provides stunning clarity and smooth motion. If you plan to capture fast-moving subjects or require more flexibility in post-production, consider utilizing a higher frame rate, such as 60fps, while maintaining full HD resolution. This allows for slow-motion effects if desired. Ensure that you select the correct color profile as well; using the D-Cinelike mode can enhance dynamic range, giving you more leeway in color grading during editing.
Another significant setting is the gimbal calibration. Before beginning any flight, calibrate the gimbal to ensure steady footage. A well-calibrated gimbal reduces unwanted vibrations and ensures that camera movements are smooth and steady, which is crucial for maintaining the professional look that MasterShots aims to achieve.
It’s also beneficial to familiarize yourself with the environmental settings. Wind conditions can significantly affect drone performance. Always check the local weather and select a flight time with minimal wind to optimize stability. Additionally, consider the time of day; shooting during golden hour (just after sunrise or before sunset) offers more aesthetically pleasing natural lighting that enhances the quality of your footage.
Finally, assess your shooting environment and choose a subject that stands out against the background. MasterShots is designed to highlight the focal point, so selecting a visually intriguing subject in an engaging setting can dramatically improve the visual appeal of your videos. With these settings and considerations in place, you’re well-prepared to make the most of the MasterShot feature and elevate your aerial cinematography to new heights.
Step-by-Step Guide to Changing MasterShot Mode
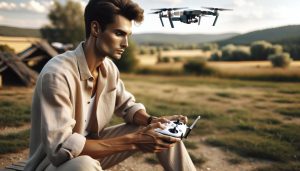
To harness the full potential of the MasterShot feature on your DJI Mini 3 Pro, changing modes is a pivotal step that can dramatically influence how your aerial footage turns out. MasterShots simplifies complex cinematography into a series of automated maneuvers, allowing you to create stunning video sequences with minimal effort. Here’s how you can seamlessly switch modes to unlock these creative capabilities.
Begin by powering up your DJI Mini 3 Pro and connecting it to the DJI Fly app on your smartphone or tablet. Ensure your drone is connected properly, as the app is your primary interface for manipulating settings, including MasterShot modes. Once connected, navigate to the camera settings interface on your screen. You will recognize the various shooting modes available to you.
Selecting MasterShot Mode
- Access the Shooting Modes: Tap on the shooting mode icon, typically located on the right side of your screen while in camera view. This brings up a menu displaying all available modes.
- Choose MasterShot: Scroll through the list and select the MasterShot option. In this mode, your drone will automatically execute a sequence of predefined movements to ensure dynamic and engaging footage.
- Customize Your Sequence: Once in MasterShot mode, you can often specify parameters like the subject to follow or adjust flight altitude. Make sure to center your chosen subject in the frame for optimal results.
- Initiate the Capture: Finally, tap the record button to start the automated sequence. Your Mini 3 Pro will now handle the maneuvering while you monitor the live feed for any adjustments, ensuring your subject remains highlighted throughout the shot.
By following these steps, you can efficiently switch to MasterShot mode and begin creating captivating videos that can impress viewers, whether you’re an aspiring filmmaker or a seasoned drone operator. Remember that practice is key; experimenting with different subjects and settings will enhance your expertise and result in more compelling content.
Advanced Techniques to Enhance MasterShot Results
To elevate your MasterShot footage created with the DJI Mini 3 Pro, incorporating advanced techniques can significantly enhance the cinematic quality of your videos. Understanding the nuances of each automated movement, modifying settings purposefully, and harnessing the drone’s full potential will allow your creations to stand out.
One effective approach is to select the right environment for shooting. MasterShot is designed to perform optimally in varied landscapes, but the visual impact can be amplified in locations with distinct features such as deep valleys, open fields, or coastal cliffs. Lighting plays a crucial role-early mornings or late afternoons provide golden hour illumination, softening shadows and adding depth.
Moreover, consider customizing the flight paths. While MasterShot automates the process, adjusting the subject’s position or modifying altitude can profoundly impact the shot’s storytelling. For instance, if you’re filming an event, instruct your drone to circle the active area instead of just following a straight line, thus capturing dynamic angles. Additionally, incorporating manual controls during automated flights to add slight adjustments can provide more flexibility, creating a balance between automation and creativity.
Utilizing the live monitoring feature on the DJI Fly app is essential to ensure your footage remains framed perfectly. Make adjustments in real-time as your drone executes its programmed maneuvers, paying close attention to how the background interacts with the subject. If your subject moves unexpectedly or if the framing goes off, having the ability to operate the drone manually momentarily can save shots.
Lastly, consider using ND filters to manage exposure and maintain frame rates while filming in bright conditions. These filters help prevent overexposure and reduce video noise by enabling smoother motion blur during rapid movements, essential for the cinematic effect. By combining these advanced techniques, you can ensure that your MasterShot videos are not only visually striking but also professionally polished, ready to impress any audience.
Troubleshooting Common MasterShot Issues
MasterShots on the DJI Mini 3 Pro can truly elevate your aerial videography, but users may occasionally encounter issues that can disrupt their creative flow. One common problem is poor footage quality, often manifesting as jittery or unstable clips. This can arise from windy conditions or incorrect gimbal settings. To mitigate this, ensure that your gimbal is properly calibrated and use the drone in more stable weather conditions. If you’re facing increased wind gusts, consider enabling the “Sport Mode,” which allows for quicker adjustments to the drone’s position, effectively stabilizing your shot.
Another issue may emerge during the execution of automated flight paths. If the drone fails to follow the designated route or goes off course, it’s crucial to double-check your GPS signal. A weak signal may cause erratic behavior. Make sure to fly in open areas away from tall structures or dense foliage which can interfere with GPS. If signal issues persist, rebooting the drone and remote controller often resolves these connectivity problems, restoring precise navigation capabilities.
Camera settings can also be a common source of frustration. Insufficient lighting may lead to overexposed or underexposed footage, while incorrect frame rates may cause the video to appear choppy. Before launching, test different ISO settings and ensure the shutter speed aligns with your frame rate, typically using the 180-degree shutter rule for optimal results. For instance, if shooting at 30fps, set your shutter speed around 1/60 seconds.
Lastly, don’t overlook potential software glitches. Ensuring that both your drone and the DJI Fly app are updated to the latest firmware can resolve various functionalities and performance-related issues. If problems persist, a reset of the drone settings to factory defaults may be necessary, restoring full operational capabilities. Make sure to back up any important configurations before doing so, as this will save you time during re-setup.
By navigating these troubleshooting steps proactively, you can enhance the reliability of your MasterShots and maximize your creative output when working with the DJI Mini 3 Pro.
Comparing MasterShot with Other Shooting Modes
When it comes to capturing breathtaking aerial footage with the DJI Mini 3 Pro, users are often faced with various shooting modes, each designed to cater to specific filming needs. Among these, the MasterShot feature stands out as a dynamic option that automates complex flight maneuvers while ensuring visually striking results. However, understanding how MasterShot compares to other shooting modes can significantly influence your creative choices.
First, consider the QuickShots feature, which offers a variety of predefined cinematic shots such as Dronie, Rocket, Circle, and Helix. While MasterShot provides a more comprehensive suite, combining several of these quick maneuvers into one seamless video, QuickShots are ideal for users seeking simplicity and fast results without the need for extensive editing. They are typically best for capturing short clips where quick deployment and ease of use are paramount, making them suitable for those new to drone flying or in situations where time is of the essence.
On the other hand, Free Mode grants pilots full control over drone movements, enabling experienced operators to achieve tailored results. This mode allows for greater creativity, as the user can manually adjust altitude, direction, and speed. In contrast, MasterShot automates these aspects, making it more accessible for users who may not have advanced piloting skills or wish to focus on capture rather than operation during a shoot. If you’re looking for a balance between creative freedom and convenience, experimenting with both modes can help you discern when to use each best.
Finally, Cinematic Mode prioritizes smoothness in flight, offering slower and more calculated movements. This mode is perfect for filmmakers focused on crafting deliberate shots that require precision. Although MasterShot incorporates elements of stabilization and fluidity in its automated sequences, it may not always provide the same level of control over movement speed as Cinematic Mode does. In conclusion, understanding these differences empowers you to choose the right mode based on your project requirements, skill level, and desired end results. Whether you opt for the convenience of MasterShot, the spontaneity of QuickShots, or the control offered by Free Mode, each option can enhance your aerial storytelling in unique ways.
Maximizing Creative Output with MasterShot Features
Maximizing the creative potential of your DJI Mini 3 Pro’s MasterShot feature can transform ordinary aerial footage into captivating visuals. MasterShot is designed to automate complex flight patterns, allowing users to focus on composition and storytelling. To harness its full capability, understanding its functionality and coupling it with strategic maneuvers is essential.
One of the most effective ways to enhance your creative output with MasterShot is by meticulously planning your shots. Take advantage of natural landscapes, urban environments, or events that provide dynamic backdrops. For instance, if you’re shooting a sunset over a scenic waterfront, enable MasterShot to combine vertical climbs and sweeping pans, capturing both the vibrant colors of the sky and the serene reflections on the water. This not only improves visual interest but also ensures that you’re telling a story through your footage.
Another critical aspect is to familiarize yourself with the various automated flight paths that MasterShot offers. Utilizing different modes-such as Dronie, Circle, or Helix-can lend your project a distinctive flair. Take time to experiment with these modes in different environments to see how varying altitudes and angles influence your footage. Try layering shots by using multiple MasterShots in a single project; this technique allows for smooth transitions and a more polished final product.
For those looking to push their limits, consider integrating post-processing techniques with your MasterShot clips. Tools like color grading and stabilization can significantly enhance the final result. By capturing high-resolution footage and then editing thoughtfully, you can produce cinematic-quality videos that rival professional productions. When applying effects, aim for a cohesive aesthetic that complements the style of your project.
Lastly, engage with the DJI community and share your experiences. User forums and social media platforms are filled with enthusiasts sharing tips, tricks, and their creative outputs using MasterShot. By learning from others, you can refine your techniques and discover new inspiration, ensuring that your drone footage remains as innovative as it is beautiful. Embracing collaboration within the community not only enriches your own skill set but also fosters a supportive environment for creativity to thrive.
Essential Accessories for MasterShot Success
Equipping yourself with the right accessories can significantly enhance the effectiveness of the MasterShot feature on the DJI Mini 3 Pro. These tools not only improve the capture quality of your footage but also streamline your workflow, allowing you to focus on creativity rather than technical limitations. Here are some essential accessories that can elevate your MasterShot experience.
High-Quality ND Filters
Neutral Density (ND) filters are crucial for achieving cinematic quality in your videos. They help manage the amount of light entering the camera, which is especially beneficial during bright daylight shooting. By reducing glare and allowing for slower shutter speeds, ND filters enable smoother motion blur, resulting in professional-looking footage that is key to executing MasterShots effectively. It’s advisable to use a set of ND filters with various strengths to adapt to different lighting conditions.
Extra Batteries and Charging Solutions
Long filming sessions can drain your DJI Mini 3 Pro’s battery quickly, especially when utilizing MasterShot modes that require extensive flight time. Investing in additional batteries ensures that you have ample power to execute multiple MasterShots without interruption. To streamline your charging process, consider a multi-battery charging hub that allows you to recharge several batteries simultaneously, getting you back in the air faster.
Portable Landing Pad
A portable landing pad is not just a safety accessory but also a tool that can enhance your shooting experience. It provides a clean, stable, and visible take-off and landing zone, reducing the risk of dirt and debris impacting your Mini 3 Pro. This ensures that you can launch into a MasterShot with confidence, especially in rugged terrain or unfamiliar environments.
Mobile Device Mounts and Controllers
To gain maximum control and flexibility when using MasterShot, consider a quality mobile device mount and possibly upgrade to a compatible remote controller. A sturdy mount secures your device for easy access to flight controls and app functionality, while a specialized controller can enhance your flying experience, offering more precise command over your drone’s movements, crucial for detailed MasterShots.
By incorporating these accessories into your setup, you empower yourself to maximize the potential of the MasterShot feature, transforming your aerial footage into stunning visuals that engage and captivate viewers. Each accessory contributes uniquely to your overall shooting efficiency and creative output, fostering a more immersive filming experience.
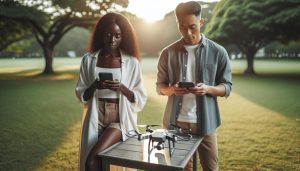
User Experiences: Tips from the DJI Community
When diving into the community of DJI Mini 3 Pro users, it’s evident that there’s a wealth of knowledge waiting to be shared about optimizing the MasterShot feature. Many pilots have discovered that small adjustments can yield significant improvements in their aerial cinematography, making their footage stand out. For instance, a common suggestion is to experiment with the different MasterShot modes before settling on a specific one for your project. Each mode offers unique pathways to creativity, so finding the right match for your vision can enhance your storytelling through video.
One effective tip from seasoned users is to ensure you familiarize yourself with the pre-flight checklist and in-app tutorials that guide you through changing modes. Many have dedicated time to practice, realizing that becoming comfortable with the interface leads to smoother operation during actual shoots. Users emphasize the importance of using the MasterShot in various environments-whether it’s a windy day or bright sunlight-to gauge how the drone performs under different conditions. This experience can provide invaluable insights, like adjusting the gimbal settings or using ND filters to manage light better.
Moreover, community members often stress the value of planning your shots. Many experienced pilots recommend sketching out a rough storyboard or a sequence of their desired shots. This pre-visualization helps in deciding which MasterShot mode will best capture the needed movements and angles, allowing for a more cohesive final video. A popular approach includes combining the MasterShot with manual flying in areas where precise control is needed to enhance creativity while still utilizing the automated features for broader shots.
Lastly, don’t overlook the benefits of engaging with the community through forums and social media groups dedicated to DJI drones. Sharing your experiences and asking for advice not only fosters a sense of camaraderie but also provides access to a repository of tips and tricks that can further refine your skills. Whether you’re seeking advice on camera settings or sharing the best locations for stunning footage, the collective experiences of the DJI community can serve as a powerful resource in mastering the MasterShot feature.
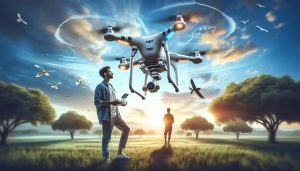
MasterShot Mode for Different Shooting Scenarios
MasterShot on the DJI Mini 3 Pro opens up a world of creative possibilities, allowing pilots to capture stunning aerial footage with just a few taps. Understanding how to leverage this feature effectively in various shooting scenarios is essential for maximizing its potential. Different environments and themes require tailored approaches, and knowing how to adjust your MasterShot settings accordingly can dramatically enhance the quality and impact of your videos.
For shooting landscapes, consider utilizing the Dronie or Rocket modes. These options effectively highlight expansive scenery, creating a sense of depth and scale. A Dronie will elevate your perspective while pulling back, making it perfect for capturing majestic mountains or sprawling seascapes. In contrast, the Rocket mode can be particularly striking for showcasing tall structures like towers or waterfalls, allowing the audience to appreciate their height and grandeur from a unique vantage point.
In dynamic environments, such as bustling cityscapes or action-packed events, the Circle and Helix modes come into play. The Circle mode is ideal for keeping your subject centered while maintaining a smooth orbit around them. This is particularly effective for capturing an exciting event, like a sports game or a festival. On the other hand, the Helix offers an engaging aerial twist, ascending while spiraling around the subject. This can create a sense of drama and excitement, perfect for action scenes or energetic subjects.
For those moments when you want to focus on storytelling, Vista mode can be your best ally. It combines elements of the aforementioned modes while providing a more narrative-driven approach. This feature is excellent for documenting a journey, as it allows for fixed angles to shift smoothly, revealing the surroundings and providing context to your main subject. Whether it’s a road trip through the countryside or a family gathering in the park, Vista mode captures your story beautifully.
By experimenting with these different MasterShot modes, you can adjust and refine your approach based on the shooting environment and desired outcome. Don’t hesitate to practice in various conditions-this will give you a sense of how each mode responds to lighting and movement, enabling you to make informed decisions when it matters most. Remember, understanding the strengths of each MasterShot mode can transform your drone footage from ordinary to extraordinary, making every flight an opportunity for creative exploration.
Legal Considerations When Using MasterShot Modes
The thrill of using MasterShot modes on the DJI Mini 3 Pro can be overshadowed by the need to navigate the complex legal landscape surrounding drone usage. Understanding these legal considerations is crucial for pilots who aim to enjoy the creative capabilities of their aircraft while staying compliant with local regulations. Each country, and often each region within a country, has specific laws governing drone flights, including the use of automated flight modes like MasterShot.
Before launching your Mini 3 Pro for a MasterShot shoot, it’s essential to check the following legal aspects:
Regulatory Compliance
- Know the Local Laws: Always research and comply with the drone regulations specific to your area. In many countries, you may need to register your drone, obtain a special license, or inform local authorities about your flights, especially in densely populated areas.
- Stay Below Altitude Limits: Many regions impose restrictions on altitude to ensure the safety of manned aircraft. Maintain a low altitude within the legal limits to avoid conflicts.
- No-Fly Zones: Familiarize yourself with no-fly zones, including schools, hospitals, and places of worship. Avoid these locations entirely to remain compliant and avoid hefty fines.
Privacy Considerations
As you capture stunning visuals, it’s important to consider the privacy of individuals. Flying a drone equipped with MasterShot modes can inadvertently record private property or individuals without their consent. Here are some best practices:
- Obtain Permissions: If your shooting area includes private property or people, ensure you have permission to capture footage. This respect for privacy not only upholds ethics but also shields you from potential legal repercussions.
- Be Mindful of Habitats: When filming nature or wildlife, be cautious not to disturb animals or encroach upon sensitive areas, which can have legal implications.
Insurance and Liability
Even the most seasoned drone operators can encounter mishaps. Therefore, acquiring adequate insurance coverage is advisable. Insurance not only offers peace of mind but also provides protection in case of accidental damage to property or bodily injury. Ensure your policy covers operations involving automated features like MasterShot, as this can be a unique area of concern during incidents.
By understanding these legal dimensions and adhering to best practices, you can confidently leverage the MasterShot modes of your DJI Mini 3 Pro, capturing breathtaking footage without the fear of legal complications. Staying informed and compliant not only enhances your flying experience but also fosters respect within the community and the environment you are filming.
Future Updates: What’s Next for MasterShot Functionality
The future of MasterShot functionality on the DJI Mini 3 Pro holds exciting possibilities, aimed at enhancing user experience and elevating the art of aerial photography. As drone technology continues to evolve, DJI is likely to roll out firmware updates that introduce new features and improvements to the MasterShot modes. These updates may include enhanced automated flight paths, which could offer more diverse angles and transitions for your footage, allowing creative content creators greater flexibility in their storytelling.
Potential Features to Look For
In upcoming updates, we might see features such as AI-assisted scene recognition that allows the drone to better understand and optimize shot settings based on the surrounding environment. This could enhance the precision of each MasterShot, making it easier for pilots to capture stunning visuals without extensive manual adjustments. Additionally, new presets for different shooting scenarios-such as landscape, wildlife, or urban environments-could streamline the process for users, enabling quick selections tailored to specific conditions.
Moreover, with advancements in connectivity technology, we may see improvements in real-time feedback and editing tools during the flight. Imagine having the ability to preview shots from a variety of MasterShot modes in real-time or access editing functions directly from your device. This could dramatically reduce editing time and allow for faster content turnaround, making it ideal for professional videographers and casual users alike.
Community-Driven Enhancements
DJI has always valued user feedback, and we can anticipate future updates that address common concerns and suggestions from the drone community. For instance, optimizing battery life during MasterShot sequences could be a high priority, as longer flight times can greatly enhance the usability of these automated modes. Furthermore, robust user training resources-a combination of tutorials and community forums-could guide both novices and experienced pilots in mastering new features efficiently.
In conclusion, the evolution of MasterShot functionality is not just about adding features; it’s about enhancing the overall user experience. By focusing on intuitive controls and powerful editing options, DJI can help users unlock their creative potential while ensuring that every flight with the Mini 3 Pro is both enjoyable and effective. Keeping an eye on firmware announcements and community updates can provide insight into how to maximize the capabilities of the drone and ensure you are at the forefront of aerial creativity.
Frequently Asked Questions
Q: How can I customize MasterShot settings on the DJI Mini 3 Pro?
A: To customize MasterShot settings, access the camera settings in the DJI Fly app before starting a MasterShot. Here, you can adjust parameters like resolution, frame rate, and image style to better suit your creative vision. Explore these options in the “Camera” menu to enhance your video output.
Q: What are the different MasterShot modes available on the DJI Mini 3 Pro?
A: The DJI Mini 3 Pro offers various MasterShot modes, including Dronie, Circle, Helix, Rocket, and Boomerang. Each mode provides unique automated flight patterns to create professional-looking shots easily. Review the available options in the app to choose the one that best fits your shooting needs.
Q: How do I switch between MasterShot modes during a flight?
A: You cannot manually switch MasterShot modes mid-flight. Instead, plan your shoot with multiple MasterShots preset before takeoff. To change the mode, land your drone, select the desired MasterShot from the settings, and take off again for the new sequence.
Q: What factors should I consider for optimal MasterShot performance?
A: For optimal MasterShot performance, consider factors like lighting conditions, wind speed, and the drone’s battery level. It’s best to shoot in good light and avoid strong winds to ensure stable footage and smooth flight paths. Refer to the section on essential settings for detailed guidance.
Q: Can I edit the MasterShot clips after capturing them?
A: Yes, you can edit MasterShot clips after capturing them using video editing software or the DJI Fly app. Consider trimming, adjusting colors, and adding music or effects to improve your video. This allows for greater creative control over the final presentation.
Q: When should I use MasterShot mode versus other shooting modes?
A: Use MasterShot mode when you want automated, cinematic footage with minimal effort, ideal for quick shoots or new locations. Conversely, use manual shooting modes for more creative control or specific compositions. Review the comparison of shooting modes for more nuanced selection.
Q: What should I do if my DJI Mini 3 Pro fails to execute a MasterShot?
A: If your Mini 3 Pro fails to execute a MasterShot, ensure the drone has a clear takeoff area and good GPS signal. Restart the drone and the app, and check for firmware updates. For persistent issues, consult the troubleshooting section for potential fixes.
Q: How does MasterShot mode enhance creative shooting with the DJI Mini 3 Pro?
A: MasterShot mode enhances creative shooting by automating complex flight patterns, allowing you to capture dynamic and engaging footage effortlessly. This feature is particularly useful for filmmakers who want to achieve professional-looking results without extensive piloting experience.
In Retrospect
Now that you’ve mastered how to change the MasterShot mode on your DJI Mini 3 Pro, it’s time to unleash your creativity! Remember, utilizing advanced shooting techniques can transform your aerial storytelling. If you’re eager to dive deeper, check out our guides on optimizing drone settings and exploring the incredible features of the DJI Mini 3 Pro, including tips for 4K video capture and stunning 48MP photos.
Don’t forget to share your flying experiences in the comments and subscribe to our newsletter for the latest tips and product updates! Stay engaged with our comprehensive drone expertise, and elevate your skills to remarkable heights. Ready to take your drone flying to the next level? Explore our recommended accessories and gear up for your next adventure!