Connecting your DJI drone to its controller is essential for unlocking the full potential of your aerial photography and videography experience. Did you know that a seamless connection not only enhances your flight stability but also ensures the safety and efficiency of your operations? Many enthusiasts struggle with the initial setup, which can lead to frustration and missed opportunities for breathtaking captures. Whether you’re a hobbyist eager to explore the skies or a professional aiming to perfect your craft, mastering this connection is a crucial step. In this guide, we’ll demystify the pairing process, providing you with clear, actionable steps to establish that vital link. Get ready to elevate your flying experience and make every flight count!
How to Prepare Your DJI Drone for Connection
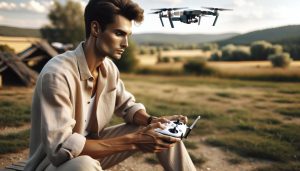
Before you embark on your aerial adventure, ensuring your DJI drone is correctly prepared for connection with its controller is crucial for a seamless flying experience. Proper preparation not only sets the stage for successful operation but also enhances safety and functionality. Follow these essential steps to get your gear ready for takeoff.
First, ensure that both your drone and controller are adequately charged. A well-charged battery minimizes the risk of losing power during flight, which can lead to emergency landings or other safety issues. Use the appropriate charger specific to your DJI model to avoid damage to the battery. For instance, using the DJI 100W USB-C Power Adapter can significantly reduce charging time, getting your drone ready in approximately 60 minutes under optimal conditions.
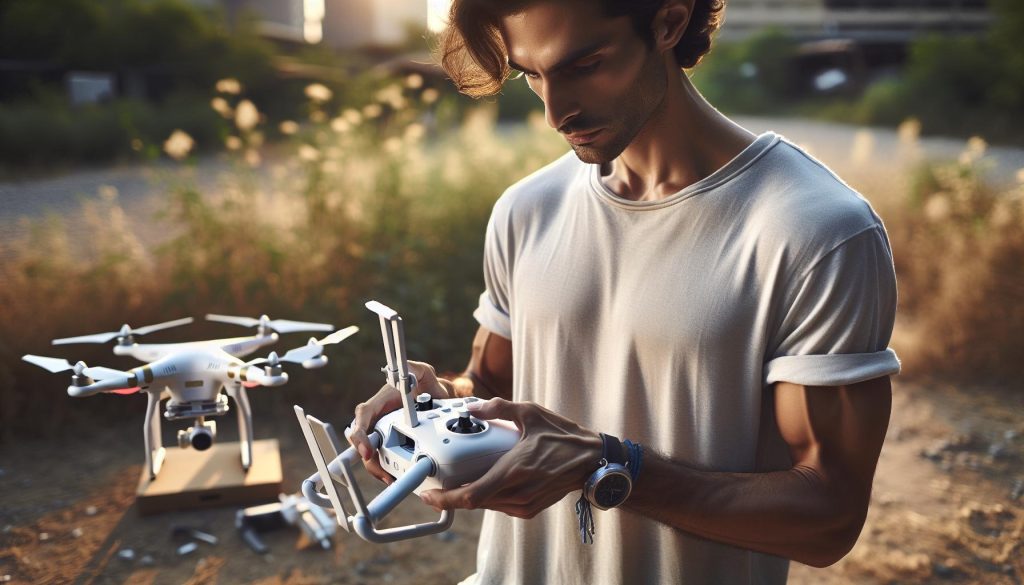
Once your batteries are charged, check all physical components for any signs of wear or damage. Examine the propellers for any nicks or cracks, as these can severely affect flight stability. If necessary, replace any damaged parts prior to connecting the drone to the controller. Additionally, ensure that the drone’s gimbal is free of obstructions to allow for smooth camera operation.
Finally, update the firmware on both the drone and controller if needed. Keeping your software up to date is vital for accessing the latest features and improvements in performance. Connect your devices to the DJI Fly app, which provides direct links to firmware updates, ensuring that everything is functioning optimally before you head out into the skies. Following these preparation steps provides peace of mind and positions you for a fun, successful flight.
Step-by-Step Guide to Pairing Your Controller

Establishing a solid connection between your DJI drone and its controller is crucial for optimal flying experiences. With the advancing technology embedded in these devices, pairing them can be greatly streamlined, making it easier for both novice and experienced pilots to take to the skies. Understanding how to effectively link your drone and controller not only enhances performance but also ensures safety and reliability during flight.
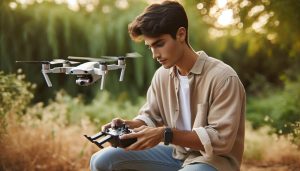
To begin the pairing process, make sure both the drone and controller are powered on and within close proximity. Start by opening the DJI Fly app on your mobile device and ensure your smartphone is securely connected to the controller via USB or Bluetooth, depending on your model. The app will act as the central interface for managing many features, so this connection is essential.
Once the app is running, find the “Connect” button or option, typically located at the top right corner of the app interface. Press this, and you may be prompted to initiate pairing mode on your drone. This usually involves pressing a physical button on the drone, identified in your specific model’s user manual; a common location is near the battery compartment or the main body of the drone. After activating pairing mode, the controller and drone should automatically recognize each other, establishing a secure connection.
If the pairing process is successful, you will see a confirmation message in the DJI Fly app, often accompanied by a green light indicator on the controller. If the devices fail to connect, ensure that they are both up to date with the latest firmware. Connectivity issues frequently arise due to outdated software. In any scenario, the app provides troubleshooting guidance, such as resetting connections or checking the environment for potential interference.
Finally, always remember to review the control settings once paired. This will include setting your preferred flight modes and gaining familiarity with manual adjustments available through the app. Not only does this make the flying experience more enjoyable, it fosters confidence as you maneuver your drone, whether for casual photography or serious aerial filming. Properly pairing your controller is just the prelude to all the exciting adventures that await in the skies!
Troubleshooting Connection Issues with DJI Drones

Connection issues with DJI drones can be frustrating, especially when you’re eager to get airborne. However, understanding the common pitfalls can significantly streamline your experience. One of the most frequent problems arises from the proximity and environmental interference. Ensure both the drone and controller are within close range, ideally within a few meters, and eliminate any sources of interference, such as other electronic devices or physical obstructions that might disrupt the signal.
Another crucial factor is keeping both devices updated with the latest firmware. Outdated software is a known culprit for connectivity hiccups. Regularly check for updates via the DJI Fly app, which not only enhances connectivity but also boosts overall performance and introduces new features. If you suspect a firmware issue, you can initiate an update process directly within the app, making it an easy fix before your next flight.
When troubleshooting, if pairing fails, you can reset the connection by turning off both devices and restarting them. This simple yet effective method often resolves minor issues. Ensure you’re following the correct pairing sequence: turn on the controller first, then the drone, and use the app to pair them properly. Additionally, looking into the drone’s user manual for any specific instructions related to your model can be beneficial.
If you continue to encounter problems, consider the LED indicators on both the drone and controller. A flashing red light may indicate connectivity issues that require deeper investigation. In this case, consulting resources such as forums or DJI support can offer tailored advice based on your specific model and situation. Taking these proactive steps will ensure that your DJI drone is ready to launch when you are.
Understanding Drone and Controller Compatibility
To achieve the best performance and safety in your drone flights, it’s essential to understand the compatibility between your specific DJI drone model and its associated controller. Different drones are designed to work seamlessly with specific controllers, often using unique frequency bands and communication protocols for optimal performance. This means that using the correct controller not only enhances the stability of your connection but also ensures that all features of your drone are fully operational.
Most DJI consumer drones, like the Mavic series and the Mini series, come with a range of compatible controllers. For example, the DJI Mini 4 Pro can be paired with the RC 2 controller, ensuring that users benefit from features such as improved transmission range and lower latency. Always verify compatibility through DJI’s official site or the product manual before making any connections. Attempting to pair unsupported devices may result in limited functionality or connectivity issues.
In addition to model compatibility, understanding the firmware requirements is critical for a successful pairing process. Both the drone and controller must have the latest firmware updates installed. Firmware updates often include vital patches that improve compatibility and performance. If your devices are on different firmware versions, it’s wise to update them via the DJI Fly app before attempting to pair.
When it comes to connecting your drone and controller, also consider the communication technologies at play. Many DJI drones utilize OcuSync technology, known for its robust connection capabilities, which allows for longer ranges and clearer video transmission compared to previous technologies. Familiarizing yourself with these differences can enhance your overall flying experience, ensuring you are prepared for any challenges that may arise.
In summary, ensuring compatibility between your DJI drone and controller is a proactive step that lays the foundation for a smoother, more enjoyable flying experience. By following the guidelines for model compatibility, staying updated on firmware, and understanding the underlying technology, you can master the connection process and focus on enjoying your flights.
Essential Firmware Updates for Optimal Performance
Firmware updates are a crucial aspect of maintaining optimal performance and safety for your DJI drone. These updates not only enhance functionality but also address potential security vulnerabilities, ensuring your device remains reliable and efficient in various flight conditions. For instance, the latest firmware often includes improvements to stability, GPS accuracy, and camera performance, which are vital for capturing high-quality footage and ensuring safe operation.
To ensure that both your drone and controller are functioning at their best, follow these steps for a seamless update process:
- Check Current Firmware Versions:
– Before performing any updates, verify the current firmware version of both your drone and controller. This can be done through the DJI Fly app, which provides a straightforward interface for viewing firmware details.
- Connect to Wi-Fi:
– A stable internet connection is necessary for downloading the latest firmware updates. Make sure your mobile device or tablet is connected to Wi-Fi when trying to update.
- Update via the DJI Fly App:
– Open the DJI Fly app and navigate to the settings menu. Here, you will find the firmware update section where the app will display available updates. Follow the prompts to download and install updates for both the drone and controller. Ensure your drone’s battery is adequately charged to prevent any interruptions during the update.
- Calibrate After Updating:
– Once updates are complete, it is advisable to recalibrate your drone’s gimbal and sensors. This ensures that all new settings are optimized for your flight conditions.
- Regular Maintenance Checks:
– Make a habit of checking for firmware updates regularly, especially before significant flights or missions. Keeping your devices updated allows you to leverage new features and enhancements that could significantly improve your flying experience.
Understanding the importance of firmware updates will enhance your operational confidence and ensure that your DJI drone delivers the best performance. With each update, you not only safeguard your investment but also gain access to innovative features designed to improve your flying and filming capabilities.
Gimbal Calibration: Why It Matters in Connection
Gimbal calibration is a vital process that ensures your drone’s camera system works seamlessly, producing stable and high-quality footage. The gimbal, which acts as a stabilizer, is responsible for keeping your camera level and reducing the effects of vibrations caused by wind or rapid movements. When you connect your DJI drone to its controller, one of the first steps you should undertake, after ensuring both devices are updated, is calibrating the gimbal.
Calibration is essential for several reasons. First, it helps to correct any imbalances that may affect the camera’s performance. If the gimbal isn’t calibrated, you might notice uneven footage or image distortion, particularly when shooting in dynamic conditions, such as rapid ascents or turns. Proper calibration can greatly enhance the quality of your aerial photography and videography by ensuring that the camera remains steady and focused on the intended subject.
To calibrate the gimbal correctly, follow these steps:
- Power On Your Drone and Controller: Ensure both devices are charged and turned on.
- Launch the DJI Fly App: Connect your mobile device to the drone’s Wi-Fi or use the controller and open the DJI Fly app.
- Locate Gimbal Calibration: In the app settings, find the ‘Gimbal’ section, usually under ‘Camera’ or ‘General Settings.’
- Follow On-Screen Prompts: The app will guide you through the calibration process. This typically involves placing the drone on a flat surface and following specific instructions to ensure the gimbal accurately adjusts itself.
Remember, a well-calibrated gimbal not only contributes to obtaining smooth and stable footage but also enhances the overall flying experience. Before significant flights, especially those aimed at capturing critical video or images, always perform gimbal calibration. This proactive step can prevent disappointing results and ensure that your investment in drone technology truly pays off.
By incorporating these calibration practices into your flight routine, you can significantly improve how your DJI drone performs and capture the breathtaking footage you envision.
Exploring Flight Modes After Connecting
Once your DJI drone is successfully connected to its controller, you open the door to a myriad of flight modes that can significantly enhance your flying experience. Understanding these modes not only boosts your piloting skills but also allows you to leverage your drone’s full potential, whether you’re capturing stunning aerial imagery, exploring new environments, or conducting professional surveys.
Common Flight Modes in DJI Drones
DJI drones typically come equipped with several flight modes, each designed for different scenarios and user skills. Here are some of the most popular modes you’ll encounter:
- GPS Mode: Ideal for beginners, this mode provides stable flight with automatic position holding. It’s great for capturing aerial photography and videos with minimal input.
- Sport Mode: Once you’re comfortable flying, switch to Sport Mode for increased speed and agility. This mode allows for faster maneuvers and responds quickly to control inputs, making it perfect for racing or when you need rapid repositioning.
- Tripod Mode: This mode slows the drone’s movements, making it easier to capture smooth footage in tight spaces or when precision is paramount. It’s particularly useful for filmmakers and photographers.
- ActiveTrack: A semi-autonomous mode where the drone can automatically follow a subject, keeping it in focus. This is excellent for dynamic filming situations, such as capturing sports or action shots.
- Waypoint Mission: This advanced feature allows you to set specific flight paths by marking waypoints on a map. It’s especially useful for detailed surveying and mapping missions, providing your drone with a detailed route to follow.
Choosing the Right Mode for Your Needs
Selecting the appropriate flight mode is crucial depending on your goals and the flight environment. For example, if you’re new to drone flying, starting with GPS Mode can help you grasp basic controls without feeling overwhelmed. As you gain confidence, experimenting with Sport Mode can offer a thrilling experience, but ensure you do so in a wide-open area free of obstacles.
It’s also vital to adapt to environmental conditions. In windy or challenging scenarios, Tripod Mode may help stabilize your footage even when flying in less than ideal weather. Additionally, using ActiveTrack can free your hands to manage other tasks while ensuring your subject remains in frame.
Real-World Tips for Maximizing Flight Modes
When exploring flight modes, consider the following practical tips:
- Practice in Safe Areas: Always try new modes in wide-open spaces to avoid collisions. This helps you familiarize yourself with the drone’s responsiveness.
- Use a Simulator: Many DJI controllers offer training simulators. Utilize these to practice switching between modes without risking your drone.
- Review Mode Settings: Before each flight, assess the settings within each mode. Some modes allow for customization, ensuring you can adjust them for your specific flying requirements.
Engaging with the various flight modes available on your DJI drone not only enhances the flying experience but also expands your creative possibilities. Experimenting within these modes, you’ll uncover new ways to capture breathtaking visuals and hone your piloting abilities, ultimately elevating your drone proficiency to new heights.
Safety Procedures for First-Time Drone Pilots
Understanding the fundamentals of safe drone operation is essential, especially for those just starting their journey into the world of aerial photography and flying technology. Before you take to the skies with your DJI drone, familiarizing yourself with safety procedures can greatly reduce the risk of accidents and enhance your flying experience. With the right precautions in place, you’ll not only protect your investment but also ensure the safety of those around you.
Pre-Flight Checks
Before every flight, conduct thorough pre-flight checks. This includes inspecting your drone for any physical damage, ensuring the propellers are securely attached and free of debris, and verifying that the battery is adequately charged. Additionally, check that the firmware is up-to-date on both the drone and controller, as outdated software can lead to performance issues or even malfunctions during flight.
Flight Area Assessment
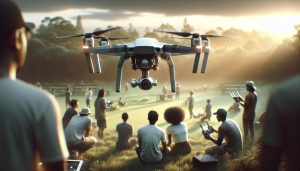
Choosing an appropriate flight area is crucial. Always fly in open spaces away from buildings, crowds, and restricted zones. Use a dedicated drone chart or app to help determine whether your flight location is safe and compliant with local regulations. Ensure that you are aware of any nearby airports, as flying too close can pose serious risks to both your drone and piloting privileges.
Flight Preparations
Once you’ve ensured that everything is in order, initiate the connection between your drone and controller with the utmost care. Follow the pairing instructions for your specific DJI model precisely to avoid common mistakes. Be mindful of surrounding weather conditions; avoid flying in strong winds or rain, as this impacts control and stability.
As you prepare for takeoff, remember to conduct a final check: calibrate your gimbal, confirm the GPS signal is strong, and switch to the appropriate flight mode that aligns with your skill level and objectives. By committing to these safety procedures, you create a solid foundation for a successful flying experience, laying the groundwork for further exploration and mastery of your drone’s advanced capabilities.
Advanced Features: Mastering Your Drone’s Capabilities
Mastering the advanced features of your DJI drone can significantly enhance your flying experience, enabling you to capture stunning aerial footage and develop your piloting skills. DJI drones are equipped with an array of functionalities that cater to both beginner and experienced pilots. From intelligent flight modes to obstacle avoidance systems, understanding these capabilities can transform your approach to drone operation and creativity in photography.
One of the standout features of modern DJI drones is their Intelligent Flight Modes. These modes, such as ActiveTrack, Waypoints, and Follow Me, allow you to automate complex flight paths and focus on composition while the drone handles navigation. For instance, with ActiveTrack, your drone can autonomously follow and capture subjects by recognizing their shapes and movements, making it ideal for dynamic filming scenarios. Utilize the intuitive interface to experiment with these modes, and consider practicing in open spaces to build confidence in various settings.
Additionally, the Obstacle Sensing and Avoidance technology incorporated in many DJI models ensures safer flights. By utilizing sensors that detect obstacles in real-time, your drone can prevent collisions, which is especially useful when flying in complex environments or when attempting low-altitude shots. Familiarize yourself with how these sensors operate; adjusting your flight paths to take advantage of this system can help you navigate obstacles while maintaining creative control over your shots.
Equally important is mastering the camera and gimbal settings to enhance your aerial photography. Adjust the gimbal settings for smoother shots, and learn about manual exposure settings to cater to different lighting conditions. Experimenting with the drone’s camera settings, such as adjusting ISO, shutter speed, and white balance, allows you to achieve more professional-quality images. Utilize the live view function on your controller to frame and refine your shots before capturing them, leveraging the drone’s stability during flight to achieve clear, high-resolution photos and videos.
By diligently exploring and utilizing these advanced features, you can elevate not only your skill set but also your creative output. As you grow more familiar with your DJI drone’s capabilities, the sky is truly the limit in your aerial adventures. Whether you’re capturing breathtaking landscapes, doing professional videography, or simply enjoying the thrill of flight, embracing these functionalities will unlock a new level of mastery in your drone experience.
Efficient Indoor Flying Tips and Techniques
Flying a drone indoors can offer unique opportunities for exploration and creative filming, but it comes with its own set of challenges. Properly preparing your space and knowing the intricacies of your DJI drone can significantly enhance your indoor flying experience. Begin by ensuring that the area is free of obstacles. Move furniture or other items that could impede your flight path and cause collisions. Opt for large, open spaces when available, as this reduces the risk of mishaps and helps you practice maneuvers confidently.
One crucial aspect of indoor flying is understanding your drone’s sensors and flight modes. Most DJI drones come equipped with advanced obstacle avoidance technology, particularly beneficial in confined spaces. Familiarize yourself with how these sensors react in indoor environments; they may work differently than they do outdoors. If your drone has a specific indoor mode-such as the “Circle” or “Point of Interest” features-this is an excellent way to automate some of your movement while maintaining control.
Practicing gentle controls is essential to controlling drones indoors effectively. Use slow, deliberate movements on the controller to minimize sudden jerks that can lead to crashes. Additionally, consider adjusting the drone’s sensitivity settings through the app to allow for smoother inputs. This can also help if you’re flying in smaller, more dynamic spaces with frequent changes in direction.
Finally, always be aware of the drone’s battery life and connectivity while flying indoors. Interference from walls and electronic devices can affect the drone’s signal to the controller. Make sure to perform routine battery checks and monitor the app for any connection alerts during the flight. This proactive approach will ensure a safe and enjoyable indoor flying experience while maximizing the capabilities of your DJI drone.
Legal Compliance for Drone Operation
Operating a drone carries a responsibility that goes beyond simply mastering the controls. Legal compliance is crucial for ensuring safe and enjoyable flights while respecting privacy and national regulations. In many countries, drone operators must familiarize themselves with local laws that govern UAV (Unmanned Aerial Vehicle) usage. This can include registration requirements, flight restrictions near airports, and altitude limits. Ignoring these laws can lead to severe penalties, including fines and confiscation of equipment.
To navigate legal compliance effectively, start by checking the regulations in your country or state. In the United States, for instance, the Federal Aviation Administration (FAA) has distinct guidelines for recreational and commercial drone use. Recreational flyers must adhere to specific rules such as maintaining visual line-of-sight with the drone, not flying above 400 feet, and avoiding restricted airspace. Commercial operators often need to obtain a Remote Pilot Certificate, which requires passing an FAA knowledge test.
In addition to national regulations, consider community or local rules that may impose additional restrictions. For instance, some cities have ordinances that prohibit flying drones over parks or designated public spaces. Familiarizing yourself with these regulations not only keeps you compliant but can also enhance your reputation as a responsible pilot within your flying community.
To further ensure compliance, keep up with any changes in legislation, as drone regulations can evolve rapidly. Engage with local drone groups or forums to stay informed about best practices and updates in your area. Additionally, using apps that offer real-time airspace information can help you avoid no-fly zones, ensuring a safer flying experience. Engaging with legal compliance as a proactive measure allows you to focus on enjoying your flying while contributing to community safety.
Accessories to Enhance Your Drone Experience
To elevate your drone operation experience, investing in the right accessories can make a significant difference in both performance and enjoyment. Whether you’re a casual flyer or a professional operator, having quality gear tailored to your specific needs can enhance your flights, improve your footage, and extend your drone’s capabilities.
Essential Accessories for Optimal Performance
One of the most important accessories to consider is extra batteries. Depending on your usage, having additional lithium-polymer (LiPo) batteries allows you to prolong your flight sessions without the downtime of recharging. Always carry a compatible battery charger, preferably a multi-charger, that can simultaneously recharge multiple batteries in a shorter amount of time.
Consider enhancing your aerial perspectives with various lens filters. Polarizing filters, for example, can reduce glare and enhance color saturation, making your aerial photography or videography more visually appealing. Neutral density (ND) filters help in capturing smooth video by reducing light entering the lens, perfect for achieving that cinematic look on sunny days.
Protective Gear
Don’t overlook protective equipment, such as carrying cases or backpacks specifically designed for your drone model. These cases not only safeguard your drone from physical damage during transport but also offer convenient compartments for each accessory, keeping you organized and ready for quick deployment.
Moreover, investing in a set of prop guards is a smart move for beginners or indoor flyers. These guards protect both the propellers and surrounding objects from accidental collisions, giving you added confidence during your flying sessions.
Advanced Tools for Enhanced Functionality
For those looking to push their drone’s capabilities even further, consider accessories like telemetry modules or GPS trackers. These tools can enhance your drone’s navigation and flight control, offering real-time data on altitude, speed, and location, which is particularly useful for complex aerial mapping projects.
Additionally, if your drone supports it, accessories such as smartphone mounts and tablets can provide larger screens for easier control and monitoring during flights. This makes it easier to view live feeds, access settings, or even plan your flight routes.
Through the right combination of accessories, not only can you boost your drone’s performance, but you also enrich your overall flying experience, making each flight a rewarding adventure. Balancing practicality with innovation ensures that you remain ahead in mastering your drone’s capabilities and achieving your aerial photography or recreational goals.
Faq
Q: How do I reset my DJI drone controller?
A: To reset your DJI drone controller, hold the power button until the device powers off. Then, while turning it back on, simultaneously press and hold the C1 and C2 buttons until the status LED blinks. This action clears any previous connections, allowing for a fresh pairing with your drone.
Q: Why won’t my DJI drone connect to the controller?
A: If your DJI drone won’t connect to the controller, ensure both devices are powered on and within range. Check for firmware updates on both the drone and controller. Additionally, confirm that no previous connections are active and try restarting both devices to refresh the connection.
Q: What should I do if my DJI controller is flashing red?
A: A flashing red light on your DJI controller indicates a connection issue or low battery. Ensure the controller is charged and check if it’s properly paired with your drone. If the issue persists, refer to the troubleshooting section in your user manual for further assistance.
Q: How can I check if my DJI drone’s firmware is up to date?
A: To check if your DJI drone’s firmware is up to date, connect your drone to the DJI Fly app. Go to the settings section and look for firmware updates. The app will notify you if a new version is available; follow the prompts to update if necessary.
Q: Can I connect my DJI drone to multiple controllers?
A: Yes, you can connect your DJI drone to multiple controllers, but only one at a time can be active. To switch controllers, disconnect the current one by following the pairing process outlined in your drone’s user manual. This allows you to switch seamlessly between controllers for collaborative flying.
Q: What are the common reasons for DJI drone connection failures?
A: Common reasons for DJI drone connection failures include outdated firmware, signal interference, long distances between the drone and controller, and previous pairing settings not being cleared. Ensure both devices are updated and try to maintain a clear line of sight during the pairing process.
Q: How do I clear previous connections on my DJI drone?
A: To clear previous connections on your DJI drone, go to the settings menu in the DJI Fly app and select “Clear Connections.” This allows you to remove old connections, which can resolve pairing issues when connecting a new controller.
Q: What is the best distance for connecting my DJI drone to the controller?
A: The optimal distance for connecting your DJI drone to the controller is within 1 kilometer (0.6 miles) for standard models. Always maintain a direct line of sight and avoid obstacles or electromagnetic interference to ensure a stable connection.
To Conclude
Now that you’ve mastered how to connect your DJI drone to its controller, you’re equipped to elevate your flying experience. Dive deeper into the world of drone technology by exploring our comprehensive guides on troubleshooting common issues and advanced flight techniques. Don’t miss out on the latest reviews of the top DJI models, including the Mavic and Phantom series, which can enhance your aerial photography and videography skills!
Are you ready to take your drone flying to the next level? Join our newsletter for tips, tricks, and exclusive updates tailored just for drone enthusiasts! Remember, the sky’s the limit when your drone is properly linked to its controller. Share your experience in the comments below or visit our resource page for more helpful tutorials. Your next adventure awaits – don’t hesitate to explore!