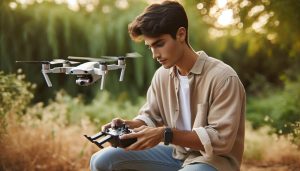
Editing DJI drone videos can elevate your breathtaking aerial footage into a captivating storytelling experience. With the right techniques, you can transform raw clips into polished masterpieces that not only impress your audience but also highlight the beauty of your surroundings. As a drone enthusiast, you might often find yourself wondering how to effectively showcase your creativity and skills in a visually stunning way.
In this guide, we’ll explore pro-level editing techniques tailored to enhance your DJI videos. Whether you’re a beginner looking to learn the basics or an experienced pilot aiming to refine your craft, mastering video editing is essential for making your aerial footage truly shine. Discover tips on choosing the right software, applying effective transitions, and utilizing color grading to make your drone footage stand out. Get ready to unlock the potential of your videos and take your storytelling to new heights!
Mastering Basic Video Editing Techniques for DJI Drones
Editing drone footage can transform stunning aerial shots into captivating stories. Mastering basic video editing techniques is essential not only for showcasing your DJI drone’s capabilities but also for creating content that resonates with viewers. Whether you are a novice or an experienced editor, understanding foundational techniques will elevate your video projects to new heights.
One of the first steps in basic video editing is organizing your footage effectively. Start by importing your files into a dedicated editing software that supports DJI formats, such as Adobe Premiere Pro, Final Cut Pro, or DaVinci Resolve. Ensure that your footage is categorized by location, date, or specific flights to streamline the editing process. This practice makes it easier to retrieve clips when assembling your story and enhances your workflow.
Another vital technique is to become familiar with cutting and trimming clips to maintain the video’s pace. Utilize the razor tool to slice your footage where necessary, and remove unwanted sections to focus on the most engaging shots. Reframing your clips can also contribute significantly to improving the overall composition. Consider using the rule of thirds and centering points of interest to create a visually appealing narrative. Additionally, experimenting with speed adjustments can add a dramatic effect; for instance, speeding up mundane drone movements or slowing down key moments to emphasize beauty or action can create a more dynamic viewer experience.
By implementing these basic editing techniques, you’ll be well on your way to crafting impressive drone videos that not only capture breathtaking scenery but also engage and captivate your audience. Remember, the key to becoming a proficient editor lies in practice and experimentation, so don’t hesitate to try different techniques and styles until you find what works best for you.
Essential Software for DJI Drone Video Editing

Editing drone footage demands a solid understanding of the right software, as the tools you choose can significantly influence the quality and creativity of your final videos. While there are numerous options available, selecting the right video editing software tailored for DJI drone footage is essential for both newcomers and seasoned professionals. Adobe Premiere Pro, Final Cut Pro, and DaVinci Resolve are among the most popular choices, providing comprehensive features that cater to various editing needs.
Adobe Premiere Pro
Adobe Premiere Pro is a professional-grade video editing software widely used in the industry. Its extensive capabilities make it ideal for DJI drone footage, allowing for advanced color grading, multi-cam editing, and powerful effects. The timeline-based interface is user-friendly, enabling editors to work seamlessly with multiple layers of video and audio tracks. Additionally, the integration with Adobe After Effects and Photoshop enhances creative possibilities, making it suitable for creating polished and dynamic videos.
Final Cut Pro
For Mac users, Final Cut Pro offers a robust environment for video editing, featuring intuitive tools designed to streamline the editing process. Its magnetic timeline allows for effortless rearranging of clips and efficient syncing of audio and video, which is particularly useful for editing drone footage where timing can be critical. Final Cut Pro also harnesses the power of the Mac’s hardware, providing smooth playback and rendering times, which benefits larger projects involving high-resolution aerial shots.
DaVinci Resolve
DaVinci Resolve stands out for its industry-leading color correction capabilities, making it an excellent choice if you want to enhance the visual appeal of your drone videos. With its free version offering a substantial array of features, it serves as a perfect starting point for beginners. DaVinci Resolve integrates editing, color correction, visual effects, and audio post-production in one platform, allowing for a streamlined workflow that many professional filmmakers appreciate.
Each of these software solutions caters to different levels of expertise and specific editing requirements. When choosing the right program, consider factors such as your budget, system compatibility, and the complexity of your project. By investing time to learn these programs, you’ll empower yourself to create stunning visuals that truly capture the essence of your aerial adventures.
Step-by-Step Guide to Import DJI Footage

Importing footage from your DJI drone is an essential step in the video editing process, and getting it right can set the foundation for a seamless editing experience. Whether you’re using a Mac or a Windows PC, the process remains relatively straightforward, allowing you to transfer stunning aerial shots directly into your preferred video editing software. Here’s how to do it efficiently.
Begin by connecting your drone or its SD card to your computer. If you’re using the drone directly, ensure it’s powered off and connect it via USB cable. For SD card imports, remove the card from your drone and insert it into an SD card reader attached to your computer. Your operating system will typically recognize the device automatically. If you’re using a Windows PC, open ‘File Explorer’ to locate the new drive, while Mac users should check ‘Finder’.
Once you locate your footage, organized in folders categorized by flight dates or shoot locations, create a new folder on your computer where you’ll store the imported videos. Drag and drop or copy and paste the selected files from the drone to this folder. It’s advisable to work with the original files without converting them, as it preserves the best quality. For users of DJI Fly or DJI Go 4 apps, the footage may also sync automatically to the cloud, giving you flexibility with your storage.
After successfully transferring the footage, open your editing software, such as Adobe Premiere Pro, Final Cut Pro, or DaVinci Resolve. Import the clips into the software by navigating to ‘File’ > ‘Import’ or using a simple drag-and-drop into the media library, depending on the software’s interface. Once your clips are in the project, you can begin organizing them by scene, duration, or any other criteria that makes sense for your workflow. This initial step ensures that your editing process will be smoother as you won’t waste time searching for clips mid-project.
By following these straightforward steps, you prepare your footage for creative transformation, setting the stage for a beautifully crafted video that showcases the breathtaking views captured by your DJI drone.
Enhancing Footage with Color Correction and Grading
To elevate your DJI drone footage from standard to spectacular, mastering color correction and grading is essential. This vital process allows you to manipulate the colors and tones of your clips to achieve a more professional look, setting your videos apart and enhancing their emotional impact. The rich visual possibilities afforded by careful color grading can transform your footage, bringing cinematic quality to aerial shots that capture sweeping landscapes or bustling cityscapes.
Understanding the Basics
Before diving into the practicalities, it’s important to grasp the basic differences between color correction and color grading. Color correction is about adjusting your footage to achieve a balanced and natural look, ensuring that whites appear white and that the overall exposure is consistent. In contrast, color grading involves stylizing your footage to fit a particular mood or theme, manipulating hues, saturation, and contrast to evoke emotions or draw attention to specific elements. Familiarize yourself with the common tools available in most video editing software, such as the color wheels, curves, and sliders, as these will be your primary instruments.
Step-by-Step Techniques
- Initial Corrections:
– Start by adjusting the white balance to eliminate color casts. This adjustment ensures that colors remain true to life and are not affected by the environmental lighting conditions during filming.
– Tweak exposure settings to enhance brightness or contrast. Use the histogram to guide your adjustments, ensuring you avoid clipping both shadows and highlights.
- Primary Grading:
– Once your footage is corrected, move on to the grading stage. Begin by adjusting the overall color tone using color wheels. For warmer visuals, increase the reds and yellows, while cooler tones can be emphasized by adding blues and greens.
– Enhance the saturation to bring out the vibrancy of colors, but be cautious-a 10-15% increase is usually ideal for a more natural yet vivid look.
- Secondary Adjustments:
– Isolate specific colors or areas in your footage that you’d like to enhance further. For instance, if you want to make a sunset pop, use tools like HSL (Hue, Saturation, Lightness) masks to selectively boost colors in that range without affecting the entire image.
– Add vignettes or subtle effects to draw the viewer’s attention to the primary subject. A slight vignette can lend a dramatic touch and help focus the narrative of your footage.
- Refinement and Export:
– View your footage on multiple screens to see how the colors translate across different displays. Adjust as necessary to ensure you achieve a uniform appearance.
– When satisfied, export your project using high-quality settings that retain the color depth and clarity of your edited footage, typically in formats like ProRes or higher-quality H.264 for broader compatibility across platforms.
By integrating these color correction and grading techniques into your workflow, you can dramatically enhance the visual quality of your DJI drone videos. Not only does this process enhance the aesthetic appeal of your footage, but it also serves as a powerful tool to convey emotions and narratives uniquely, ensuring your aerial adventures captivate audiences far and wide.
Utilizing Cinematic Transitions for Engaging Videos
When editing drone videos, one key element that can elevate your production value is the use of cinematic transitions. These transitions serve not only as a means to move between scenes but also as a tool to enhance storytelling and maintain viewer engagement. To create captivating content, understanding how and when to implement various transitions can drastically affect the flow and overall impact of your video.
Cinematic transitions can range from simple fades to dynamic movements like whip pans or dissolves. Each type serves a specific purpose: for instance, a fade-in can establish a scene’s mood, while a cut keeps the pacing sharp and immediate. Utilizing smooth transitions such as cross dissolves can help blend two clips together seamlessly, often used during emotionally charged moments to evoke a feeling of continuity or reflection. On the other hand, quick cuts can create excitement or urgency, appropriate for action sequences or rapidly changing landscapes captured by your DJI drone.
To effectively implement these transitions, consider the emotional tone you wish to convey. For dramatic shifts in scene or mood, opt for longer transitions to allow viewers to digest the content. Conversely, for energetic scenes, using faster transitions will help keep the tempo high. It’s vital to ensure transitions align with the beat of accompanying music, as synchronization can significantly enhance the overall viewing experience. Experimentation is key; different transitions can yield varied effects, so play with options to find what best suits the narrative of your video.
Remember that transitions should enhance, not distract. Too many flashy transitions can overwhelm your audience, detracting from the beauty of the drone footage. Aim for a balance where each transition complements the storytelling and visual flow. As you edit, keep in mind that simplicity often leads to elegance-sometimes, a simple cut is more effective than a complex transition. By mastering the art of cinematic transitions, you empower your storytelling and can transform standard aerial footage into a compelling visual narrative.
Integrating Music and Sound Effects for Impact

The right music and sound effects can elevate your drone videos from standard clips to gripping visual narratives. Sound has a profound impact on the viewer’s emotional experience, creating an atmosphere that can transform a simple aerial landscape into an epic journey. When integrating audio elements, timeliness and harmony with the visuals are crucial, making the audience feel more connected to the imagery on screen.
To start, choose background music that complements the mood and tone of your video. If you’re capturing breathtaking landscapes, opt for ambient or orchestral tracks that evoke a sense of wonder. Conversely, if your footage includes fast-paced action or adventure, select upbeat or electronic tracks that match the video’s energy. Websites like AudioJungle, Epidemic Sound, and PremiumBeat offer extensive libraries of royalty-free music suited for various themes and vibes.
When integrating sound effects, think about enhancing key moments in your footage. For instance, if your drone dips low to capture the sound of waves crashing or a bustling cityscape, adding real sound effects can draw viewers deeper into the scene. Use effects that match the visuals-like adding swooshes during fast aerial movements or ambient sounds that reflect the environment (like birds chirping in a forest). This not only enriches the viewing experience but can also serve to underscore transitions or important narrative points.
Timing and Synchronization
Synchronizing audio with visuals is essential for maintaining viewer engagement. Pay attention to the beats of the music and try to align key visual actions-such as transitions, cuts, or climactic moments-with peaks in the audio. This technique creates a cohesive experience that feels intentional and polished. Don’t hesitate to adjust the length of your clips or the tracks themselves to ensure perfect alignment.
In your editing software, consider utilizing keyframes to control music volume, allowing you to dip the sound for dialogue or enhance impactful visuals through crescendos. This dynamic range not only highlights important narrative moments but also ensures that the audio remains balanced throughout the video, preventing any auditory distraction from the stunning visuals captured by your DJI drone. By mastering the integration of music and sound effects, you will create a more immersive and professional quality video that resonates with your audience.
How to Create Slow Motion and Time-Lapse Effects

Creating captivating slow motion and time-lapse effects can transform your drone footage, adding a new dimension of creativity and storytelling. These techniques allow you to emphasize the beauty of fluid movements or to depict the passage of time in a visually striking way. Whether you’re capturing the graceful flutter of birds in slow motion or the rapid bustle of a city in time-lapse, mastering these effects can significantly enhance your videography.
To achieve slow motion, you’ll want to shoot your footage at a higher frame rate, typically at least 60 frames per second (fps) or higher depending on your drone model. Many DJI drones, including the Mavic and Air series, offer this capability. When you playback the footage at standard 30 fps, the result is a smooth slow-motion effect that draws attention to intricate details, like the wings of a bird or crashing waves. In your editing software, adjust the playback speed of your clips accordingly-reducing them to around 50% or slower can help achieve the desired effect without introducing choppiness.
For time-lapse effects, the approach is a bit different. Instead of capturing a high frame rate, you’ll need to take still images at set intervals or use the built-in time-lapse mode available in many DJI drones. For instance, you can configure your drone to capture a photo every few seconds as it hovers over a scene, whether it’s a sunset or the hustle of a city. Once you import these images into your editing software, you can compile them into a video sequence that portrays the rapid movement of time, creating a mesmerizing visual narrative. Adjust the speed and the number of frames per second in your editing software to achieve the right flow for your project.
Incorporating these effects not only enhances the aesthetic quality of your videos but also allows you to communicate a deeper narrative. Experiment with various scenes and settings; you might find that a serene lake’s stillness turns breathtaking in slow motion, while a bustling street can tell a compelling story through time-lapse. To ensure the best outcomes, always consider the lighting conditions and the stability of your drone during the capture process, minimizing unwanted shake that can detract from these smooth effects.
Incorporating Text and Graphics for Professional Touch
Incorporating text and graphics into your DJI drone videos can significantly elevate the overall impact, making your content more engaging and informative. Whether you’re a hobbyist sharing beautiful landscapes or a professional creating marketing materials, the thoughtful addition of titles, captions, and graphics can streamline storytelling and enhance viewer engagement.
Start by selecting a style that complements your video’s theme. The font choice should resonate with the visuals; for example, a sleek, modern font enhances the aesthetic of urban footage, while a more rustic font is better suited for nature scenes. It’s essential to strike a balance between visibility and subtlety; text should not overshadow the stunning visuals but still be clear to read. You can use tools like Adobe Premiere Pro or Final Cut Pro, which offer extensive font libraries and effects to animate text for dramatic or charming presentations.
When it comes to graphics, consider including logos, watermarks, or lower thirds to establish your brand and enhance professionalism. Adding arrows or highlights can guide viewers’ eyes to critical visual elements, drawing attention to features or action within a scene. For instance, if your drone footage showcases a specific landmark, using an animated arrow that points to the landmark as you describe it can strengthen your narrative.
Lastly, don’t forget about timing and placement. Text and graphics should appear on screen long enough for your audience to read and absorb the information but be precise with their entrance and exit to maintain a clean look. Utilizing software features that allow smooth transitions will help achieve this goal. By strategically integrating these elements, you’ll create a more polished product that not only looks great but also communicates your message effectively.
Advanced Editing Tips: Stabilization and Effects
To achieve smooth and visually appealing drone footage, understanding stabilization techniques and effects is paramount. Drone recordings are often susceptible to vibrations and sudden movements, resulting in shaky clips that can detract from the viewing experience. Utilizing software tools designed for stabilization, such as Adobe Premiere Pro or DaVinci Resolve, can significantly enhance the quality of your videos. These programs offer powerful stabilization features that analyze your footage to reduce unwanted motion, allowing you to present your aerial shots in an engaging manner.
One effective method for stabilization involves the use of warp stabilizer tools available in editing software. When applied, the warp stabilizer evaluates the entirety of your clip, detecting frame-to-frame movements and compensating for any jerks or shakes. For best results, ensure that your footage is captured in high resolution and with some margin around the subject matter so that post-cropping is possible without losing quality. It’s advisable to activate these stabilization features only when necessary, as excessive stabilization can sometimes lead to a “bumpy” appearance, especially with fast-moving footage.
Incorporating Effects to Elevate Your Footage
Adding effects can also transform your DJI drone videos, ensuring they capture and hold viewer attention. Visual effects like slow motion or highlights of specific actions can add drama and excitement. For instance, if you’re showcasing a scenic view or an exciting activity, consider emphasizing key moments with slow-motion playback. Most editing software allows you to select segments and adjust playback speeds smoothly, showcasing those breathtaking moments in a way that draws eyes to your video.
Another powerful effect is the use of color grading. Establishing a specific mood or tone can evoke emotional responses from your audience. Color grading tools enable you to enhance or filter the colors in your footage, bringing certain elements to life while toning down others. For example, a slightly warmer palette can create a nostalgic feel, while cooler tones may impart professionalism and clarity. Always work with a reference in mind, ensuring that the final output aligns with the vision you wish to convey, whether it be an uplifting travel vlog or a dramatic aerial sequence.
By combining stabilization techniques with thoughtful effects, you empower your creative endeavors, producing drone videos that are both visually stunning and narratively engaging. Consider experimenting with these options to find the ideal balance between aesthetics and storytelling, ensuring that your audience remains captivated from start to finish.
Exporting DJI Video: Settings for Best Quality
Exporting your edited DJI drone video is crucial for retaining the quality and detail captured during your flights. Understanding the optimal settings for exporting can dramatically affect the final output of your project, whether it’s meant for online sharing, personal archives, or professional presentations. Here are some expert tips and guidelines to make sure you get the best possible result.
To start, the resolution and frame rate of your project play a vital role in the export settings. Typically, you will want to retain the highest quality from your footage. For most drone footage, exporting in 4K resolution (3840×2160) is recommended, as this provides a crisp and detailed image. If your original footage was shot in a lower resolution, you may consider exporting at that resolution to avoid unnecessary upscaling that could reduce quality. Stick to 30fps or 60fps for most videos, while high-action sequences can benefit from 120fps or even 240fps for slow-motion effects.
Another crucial aspect is the codec you choose for exporting. H.264 is a common choice for web videos due to its excellent balance between quality and file size. For maximum quality, especially for video archiving or circular presentations, consider using H.265 (HEVC), which offers better compression without sacrificing as much quality. When exporting, selecting a target bitrate between 15 to 40 Mbps will usually yield a great result; higher bitrates improve quality but also increase file size, so finding a balance is essential based on your needs.
Additional Export Settings
- Audio Settings: Choose a sample rate of 48 kHz and a bitrate of at least 192 kbps to ensure your audio is clear and professional.
- Color Space: Use Rec. 709 for standard projects; if you’re working with HDR footage, select the appropriate HDR settings.
- File Format: For most platforms, MP4 works best due to its compatibility and compression efficiency. However, if your project requires high-quality outputs for editing or broadcasting, consider using MOV.
Before finalizing your export, it’s wise to review the entire video one last time, checking for any remaining edits or adjustments. Adjusting the export settings may take some experimentation, especially if you are still getting familiar with different software and codecs, but taking the time to optimize these parameters will ensure a polished final product that showcases the stunning footage captured by your DJI drone. With these recommendations, you can elevate your drone videos to a professional level, ready for any audience.
Sharing Your Edited Drone Videos Online
In today’s digital landscape, can significantly enhance your visibility and engagement as a content creator. With breathtaking aerial shots and captivating views captured by DJI drones, you have the power to tell compelling stories that resonate with an audience. However, understanding the best platforms and practices for sharing your footage is essential for achieving maximum impact.
Start by selecting the ideal platform that suits your target audience. YouTube remains a top choice for video content, offering extensive reach and the potential for monetization, especially if you focus on niche content, like travel vlogs or tutorials on drone flying. For quick snippets, consider Instagram or TikTok, which emphasize short, engaging videos. Each platform has its nuances regarding video format, so be sure to tailor your content accordingly to engage viewers effectively.
To optimize your videos for online sharing, utilize enticing thumbnails and descriptive titles to attract viewers. On platforms like YouTube, leveraging keywords in your titles and descriptions can drastically improve discoverability through search engine optimization (SEO). Engage your audience further by crafting thoughtful descriptions that provide context for your footage, alongside relevant hashtags for platforms like Instagram. This practice not only broadens your reach but also links your content to trends and interests within your niche.
Finally, encourage community interaction. Prompt viewers to like, share, and comment on your videos, and don’t hesitate to engage in discussions yourself. Responding to comments not only fosters community but also signals to algorithms that your content is engaging, further boosting its visibility. Collaboration with other creators can also introduce your work to new audiences, enhancing your online presence while sharing valuable insights and experiences.
By effectively sharing your edited videos, you can build a community around your passion for aerial cinematography and drive greater engagement, turning casual viewers into dedicated followers.
Troubleshooting Common Editing Issues with DJI Footage
Editing drone footage can sometimes lead to unexpected challenges, and being prepared to troubleshoot common issues can significantly enhance the editing process. From color grading discrepancies to synchronization issues, addressing these concerns head-on will ensure a polished final product.
One prevalent issue with DJI footage is the disparity in color grading between clips. This often occurs due to varying lighting conditions or settings on the drone during recording. To remedy this, use your editing software’s color correction tools to match the color profiles. Adjust parameters such as exposure, contrast, and saturation for consistency across clips. Many software platforms also offer color match features that can automatically align the hues of different shots, streamlining this process.
Another common hurdle arises when audio tracks do not sync with the video footage. This can be particularly bothersome if you’ve recorded audio separately or used ambient sound from your surroundings. To fix this, zoom in on the timeline of your editing software to align the audio waveforms with the action in the video. Alternatively, many editing programs include an auto-sync function that automatically aligns audio and video based on waveform analysis, saving you time and reducing frustration.
Additionally, stuttering or choppy footage can become an issue during playback, which typically stems from high-resolution footage being processed on less powerful editing systems. One solution is to create proxy files-lower-resolution versions of your footage that are easier to handle during editing. This allows you to edit smoothly and then swap back to the high-resolution files for final rendering.
Finally, pay attention to exporting settings to avoid the pitfall of reduced quality when sharing your edited video. Ensure you’re choosing the appropriate codec and resolution suited for your intended platform, as this can notably impact the clarity and overall presentation. Following these troubleshooting tips will empower you to tackle common editing issues, allowing your creativity to shine in every project.
Q&A
Q: What are the best video editing apps for DJI drone footage?
A: Some of the best video editing apps for DJI drone footage include Adobe Premiere Pro, Final Cut Pro, and DaVinci Resolve. These applications offer advanced editing features like color grading and stabilization, allowing you to enhance your drone videos effectively. Each provides a variety of tools that cater to different editing needs, suitable for both beginners and professionals.
Q: How do I stabilize shaky drone footage?
A: To stabilize shaky drone footage, utilize built-in stabilization features in editing software like Adobe Premiere Pro and Final Cut Pro. You can also use plugins like Warp Stabilizer or third-party options like ReelSteady for additional stabilization. Make sure to select the correct settings to maintain video quality while reducing shake.
Q: What is the best way to color correct DJI drone videos?
A: The best way to color correct DJI drone videos is to use color grading tools in programs like DaVinci Resolve or Adobe Premiere Pro. Start by adjusting the exposure and white balance, then enhance colors using curves and color wheels. This process improves the visual appeal and matches the overall mood of your project.
Q: Can I edit DJI drone videos on a mobile device?
A: Yes, you can edit DJI drone videos on mobile devices using apps like Adobe Premiere Rush, LumaFusion, or DJI’s own DJI Mimo app. These mobile-friendly editing tools allow you to trim clips, add music, and apply filters, making it convenient to edit on the go.
Q: How can I add music to my DJI drone videos effectively?
A: To add music effectively, choose tracks that complement the visuals and mood of your drone footage. Use royalty-free music from sources like Epidemic Sound or Artlist. In your editing software, align the beat of the music with key visual moments for a more engaging viewer experience.
Q: What format should I use to export my edited DJI drone videos?
A: For optimal quality, export your edited DJI drone videos in H.264 format, which offers high quality with manageable file sizes. Set the resolution to match your source footage, typically 4K or 1080p, and choose a bitrate that balances quality and file size for your intended use.
Q: How can I create slow-motion effects in DJI drone videos?
A: To create slow-motion effects, use a higher frame rate during shooting, ideally 60 fps or higher. In your editing software, slow down the footage to your desired speed while ensuring smooth playback. Most editing tools allow speed adjustments that preserve video quality during the slow-motion effect.
Q: What troubleshooting tips exist for common DJI video editing issues?
A: Common DJI video editing issues can include missing footage, lagging playback, or color mismatch. Ensure your hardware meets the software’s requirements, check file integrity, and update software regularly. For color issues, revisit your color correction settings and adjust accordingly to maintain consistency across clips.
In Retrospect
Now that you’ve unlocked pro editing techniques for your DJI drone videos, it’s time to put your newfound skills to work and elevate your content creation! Remember, the key takeaways include mastering video stabilization, effective color grading, and utilizing sound design to captivate your audience. Don’t let your stunning footage sit idle-start editing today and transform your aerial shots into breathtaking narratives.
For even more insights, check out our guides on enhancing aerial photography techniques and legal regulations for drone flying. Want to stay updated on the latest drone innovations? Sign up for our newsletter for exclusive tips and resources! If you have further questions or need personalized advice, feel free to comment below-your journey as a drone videographer is just beginning, and we’re here to help every step of the way.